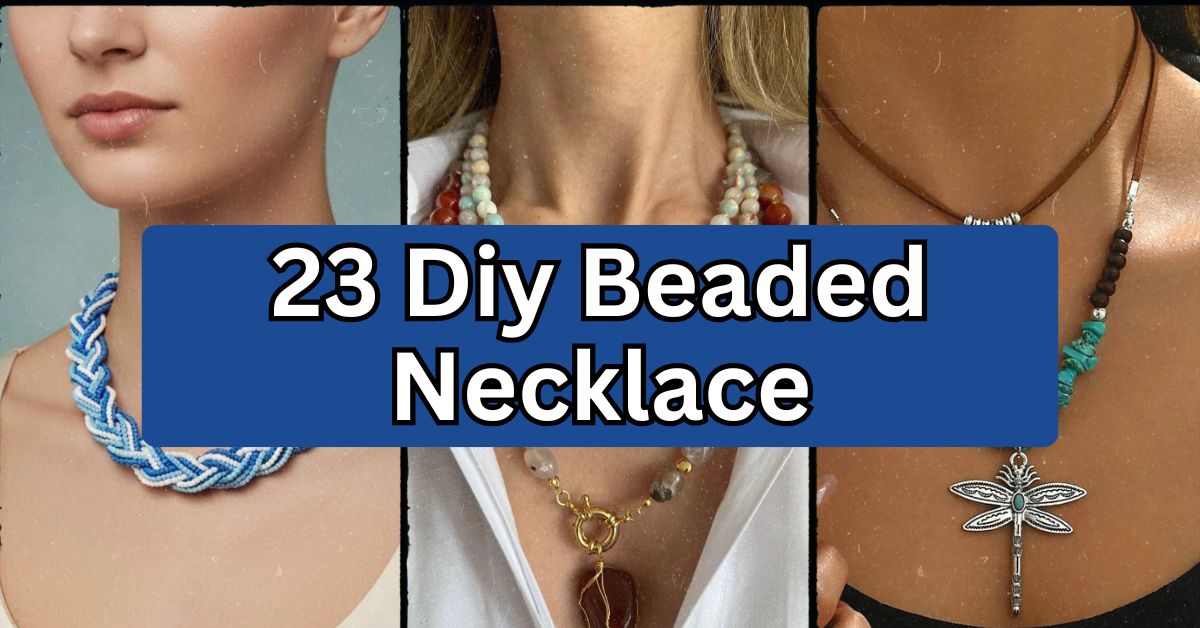
23 DIY Beaded Necklace Ideas That Anyone Can Make at Home
From years of experimenting with various craft tutorials, I know for a fact what beaded necklace DIY project works and what doesn’t because some are photo worthy while others fall apart soon after their completion. This tutorial is based on my experience, the costs of actual materials, and time devoted to working on craft projects.
What does make a perfect DIY beaded necklace? The perfect DIY beaded necklace involves using the correct thread, choosing the right sized beads, and installing a reliable clasp to create attractive and durable jewelry. The best projects will involve matching your skills and using the materials that will not break or come off in a few weeks.
Stay with me because I am going to share 23 unique necklace styles, all materials needed, and mistakes that you should avoid making in your project.
Why Make Your Own Beaded Necklace?
The truth of ready-made jewelry is that they are either expensive or not durable. In my case, it was a combination of both when I bought a $40 necklace only to have it break after a month’s wear. Beading a DIY necklace ensures that you get to decide on its colors and durability. Additionally, making your own jewelry is a very relaxing activity since you can bead while watching TV. Whatever your level of experience, these 23 ideas will provide you with enough options.
1. Simple Strung Pearl Necklace
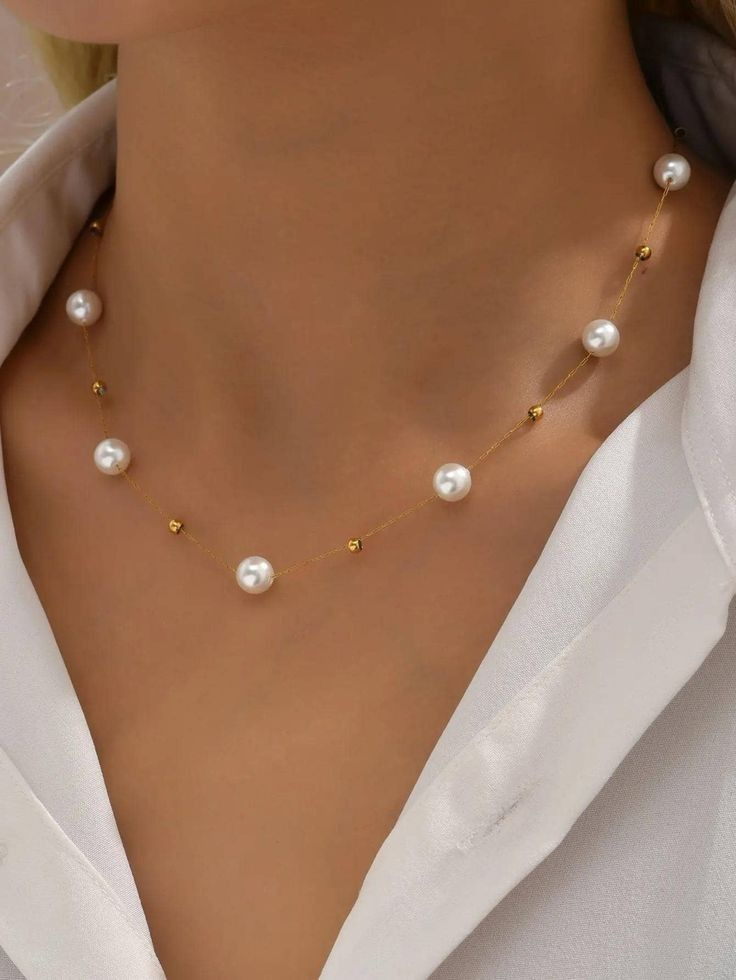
And that is how you should begin. Strands of pearls (real or fake) strung together using silk threads make for a classic necklace that will never go out of fashion. In this case, select pearls whose holes are uniform for easy threading. Work on a neutral color scheme of white or cream or try out dyed pearls in shades of blush pink and grey. Work out the arrangement of the strands using a bead board before making any knots to secure the pearls individually to avoid undoing the entire string should it break. This design works well for women living in both traditional and minimalist homes and can be paired with both blouses and casual T-shirts. Now let us examine a more trendy design.
2. Beaded Choker with Charm

There was a massive revival of chokers, and crafting your own enables you to give an extra personalized touch that store-bought accessories will lack. Go for smaller seed beads all of one color, and include a focal bead such as a moon charm, initial, or small gemstone, placed right in the center. Using memory wire is ideal as this material maintains its shape even without a clasp. Stick to neutral colors for your design as black, gold, or jewel tones will make the accessory look more professional. This item is suitable for a more contemporary look and looks best layered with longer necklaces. And now we can go on to a more daring project.
3. Layered Multi-Strand Necklace
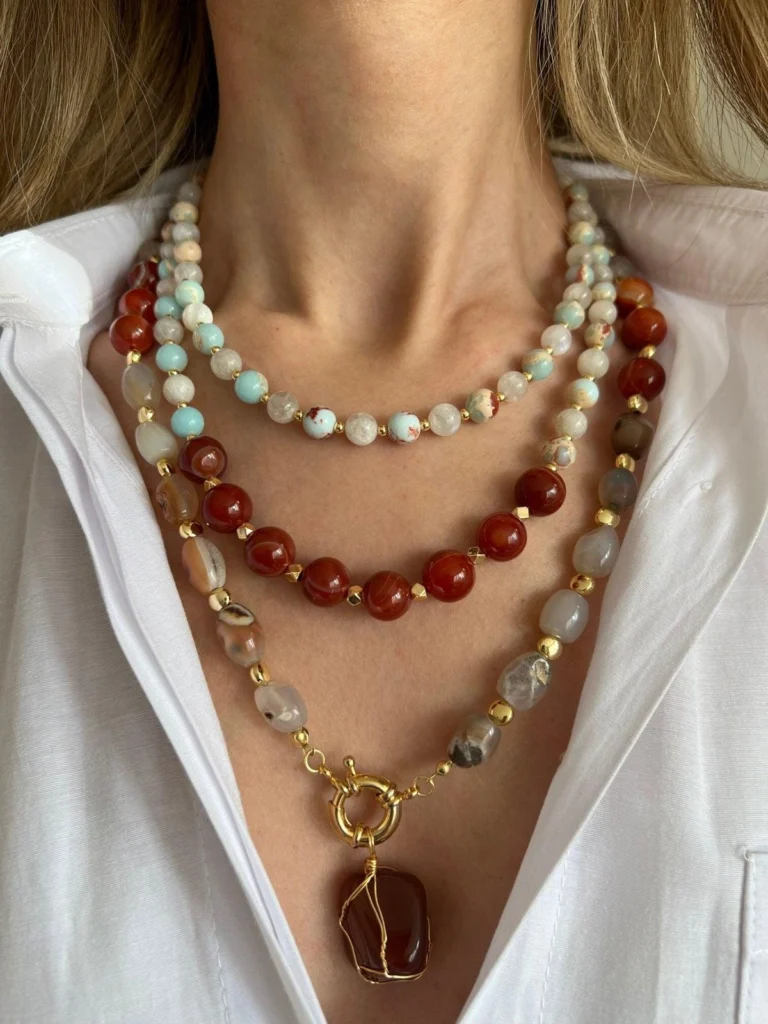
Layering multiple strands of different lengths creates instant visual interest without much extra effort. Use three to five strands of varying bead sizes—maybe small seed beads on one strand and chunkier wooden beads on another. Coordinate colors within the same family (all earth tones, or all jewel tones) so the layers feel intentional rather than chaotic. A multi-strand clasp makes assembly way easier than trying to tie off five separate strands individually. This bohemian-leaning style fits eclectic and rustic home aesthetics and wardrobes equally well. Attach a small ring at the back to keep strands from twisting during wear. From here, we’ll dive into wirework.
4. Wire-Wrapped Pendant Necklace

Wire wrapping lets you turn any interesting stone or bead into a focal pendant without drilling holes. This technique takes practice, but even wobbly first attempts look intentionally rustic. Copper or silver-plated wire works best for beginners since it’s forgiving and affordable. Pair your wrapped pendant with a simple beaded chain in coordinating tones—turquoise stones with copper wire, for example, create a warm, earthy palette. This style fits farmhouse and boho-chic aesthetics particularly well. My best tip: practice your wire wraps on scrap wire first before touching your good stone. Once you’ve mastered wrapping, seed beads open up a whole new technique.
5. Seed Bead Woven Necklace
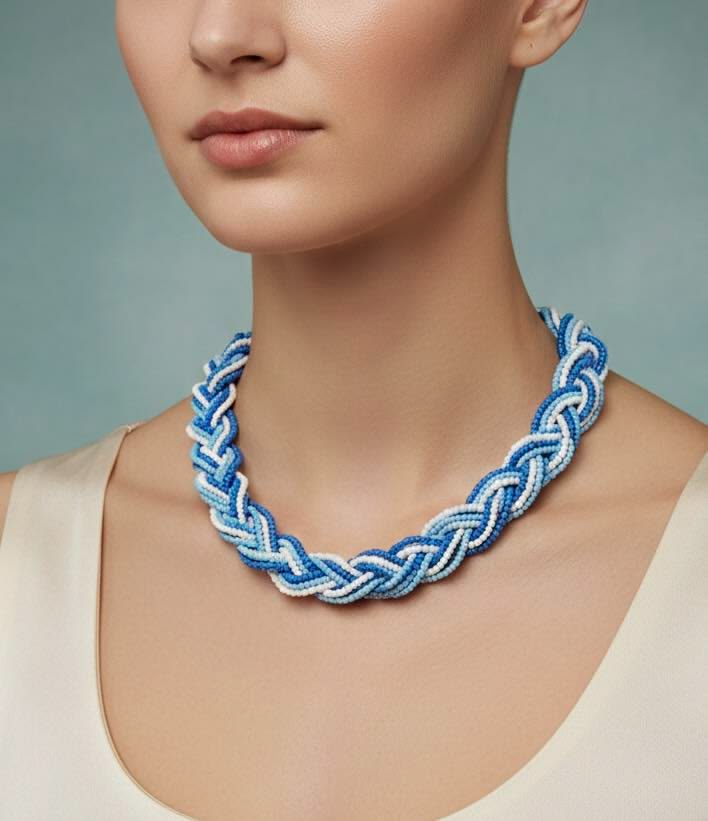
Seed bead weaving takes more patience, but the payoff is a necklace that looks handmade in the best way. Using a needle and thread (or fishing line for durability), you’ll weave small seed beads into patterns like peyote stitch or brick stitch. Stick to two or three coordinating colors for your first attempt—too many colors gets confusing fast. This technique suits intricate, detailed home styles and wardrobes, think maximalist or vintage-inspired looks. Work in short sections and check your tension often, since weaving too tight will cause puckering. Next up, statement pieces made from bigger stones.
6. Gemstone Statement Necklace
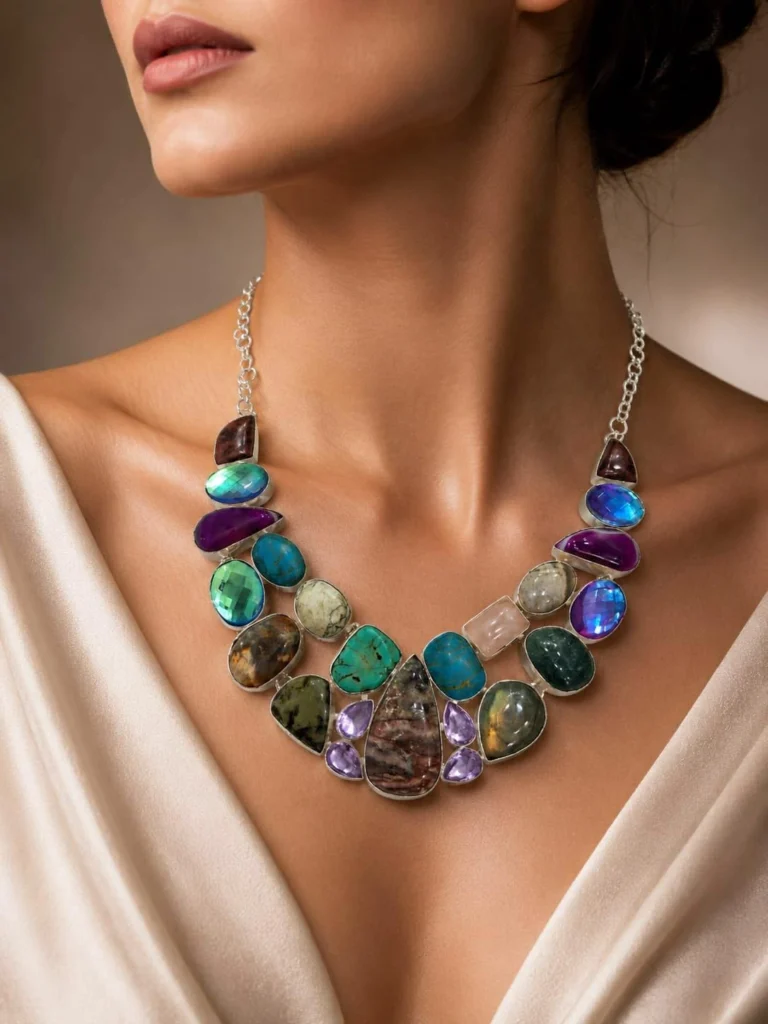
Big, chunky gemstone beads make an outfit without needing much else. Choose one dominant stone type—rose quartz, amethyst, or turquoise—and let it shine on a simple leather cord or sturdy beading wire. Keep the rest of the design minimal so the stones stay the focus. This bold style suits modern and glam aesthetics, standing out against solid-color outfits. Because gemstone beads are heavier, always use a crimping tool to secure your clasp properly, or the whole thing could slide apart. Let’s lighten things up with something more delicate next.
7. Beaded Tassel Necklace
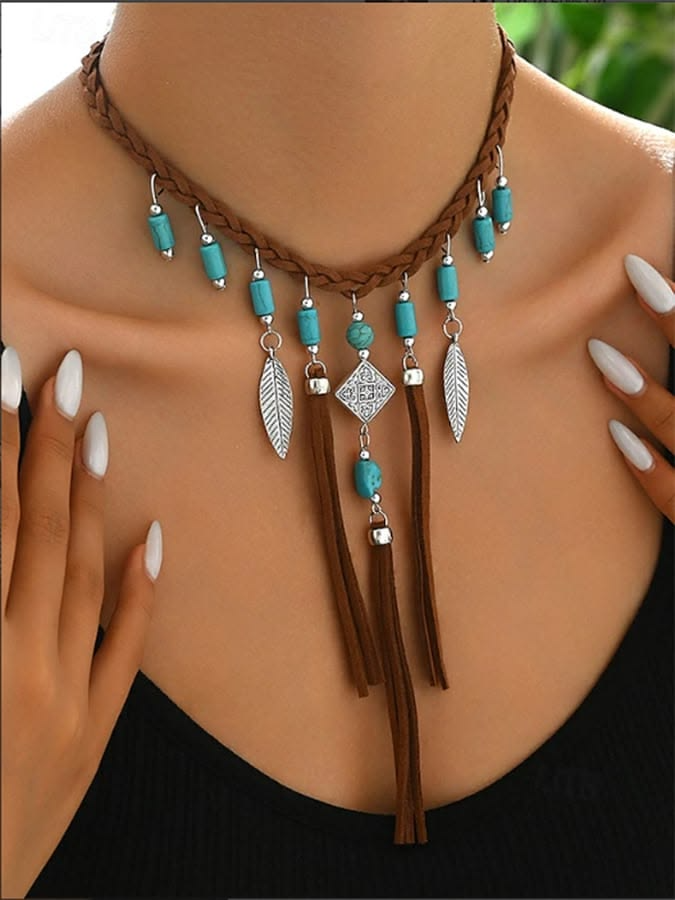
Tassels add movement and texture that flat beaded strands just can’t match. String a simple beaded chain, then attach a fabric or beaded tassel as the centerpiece. Silk thread tassels in bold colors like emerald or mustard pop against neutral beads. This design fits bohemian and global-inspired styles beautifully. My tip: seal the top of your tassel with a small drop of clear glue before attaching it, so threads don’t fray over time. From tassels, let’s talk about braiding techniques.
8. Macrame and Bead Combo Necklace
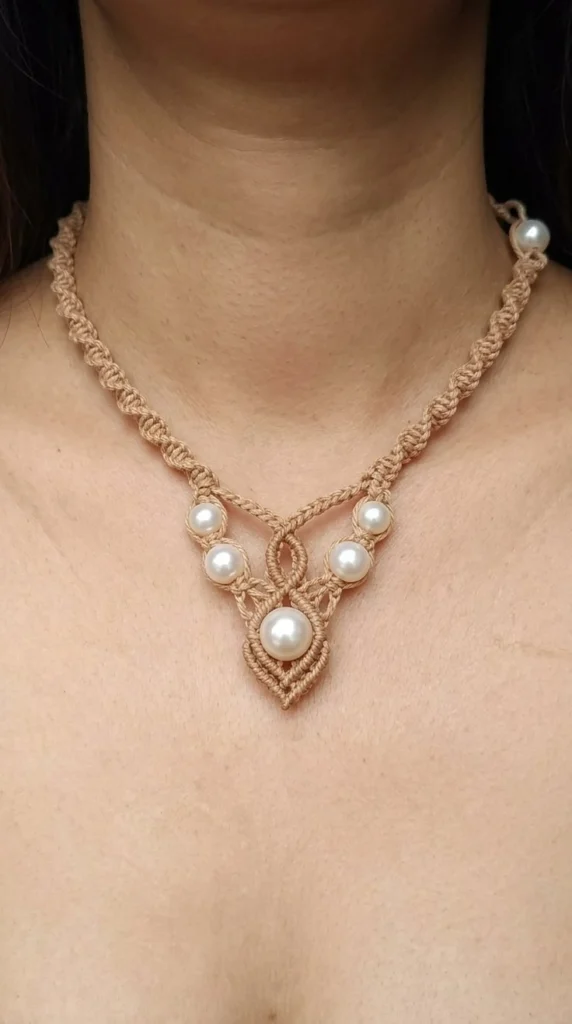
Combining macrame knotting with beads creates texture you can’t get from stringing alone. Use waxed cotton cord for the macrame base, then thread wooden or ceramic beads into the knotting pattern as you go. Earthy, neutral colors work best here—think cream, tan, and brown. This style fits rustic and bohemian home aesthetics particularly well. Practice basic square knots on scrap cord first since macrame has a learning curve. Next, we’ll simplify things with memory wire.
9. Memory Wire Beaded Necklace
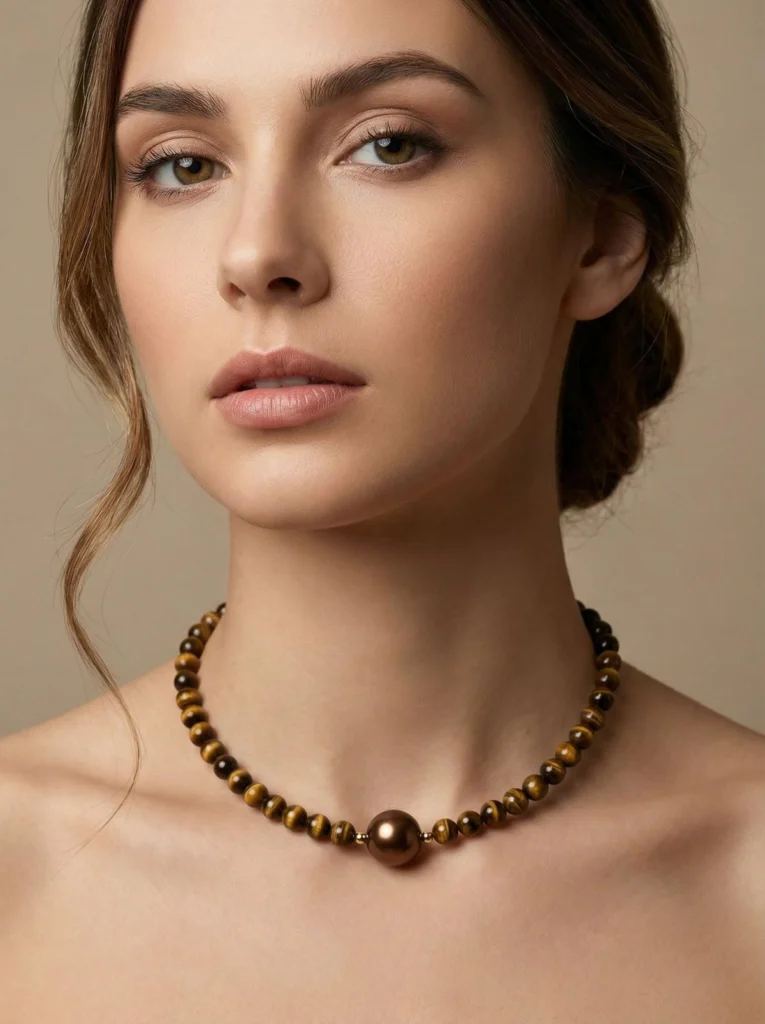
Memory wire is a beginner’s best friend because it holds its coiled shape permanently—no clasp needed. Simply thread beads onto the pre-shaped wire and bend small loops at each end to keep beads from sliding off. Mixed metallics or a single bold color work well for this style. It suits minimalist and modern aesthetics since the design stays clean and simple. Always use wire cutters specifically made for memory wire, since regular cutters will dull quickly. Now let’s explore a shape that draws the eye downward.
10. Beaded Y-Necklace
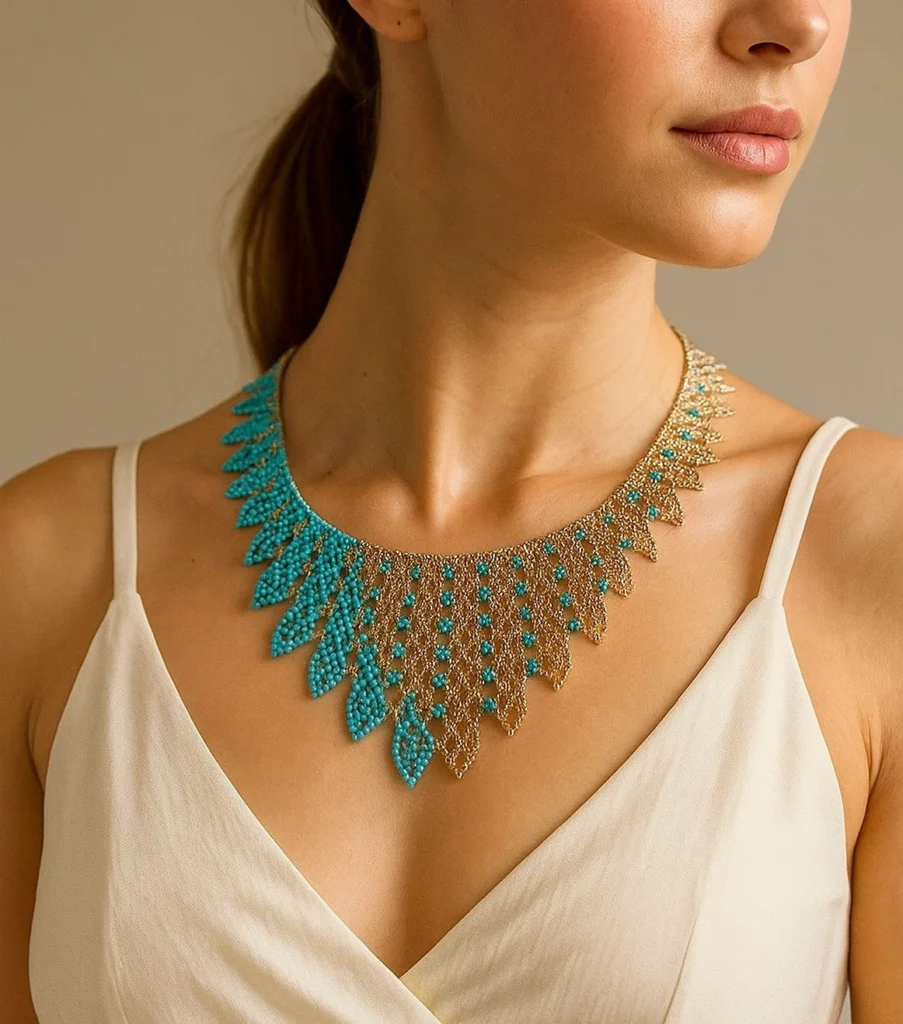
The Y-necklace uses a long chain that tapers into a single pendant or bead drop, creating a slimming, elongated look. String small beads along thin chain, then finish with a slightly larger bead or charm at the bottom point. Gold or rose gold tones with small crystal accents look particularly elegant. This design suits traditional and glam styles alike. Keep the beaded sections evenly spaced for a polished, symmetrical finish. Moving on, let’s talk sparkle.
11. Crystal Bead Necklace

Crystal beads catch light in a way regular glass beads simply don’t, making them perfect for special occasion pieces. Choose faceted crystal beads in a single color family—clear, champagne, or soft pink—and string them on sturdy beading wire. This glamorous style fits formal and modern aesthetics best. A helpful tip: alternate crystal sizes (small, medium, small, medium) to create rhythm rather than a flat, uniform look. Next, we’ll go bigger with bib-style designs.
12. Beaded Bib Necklace
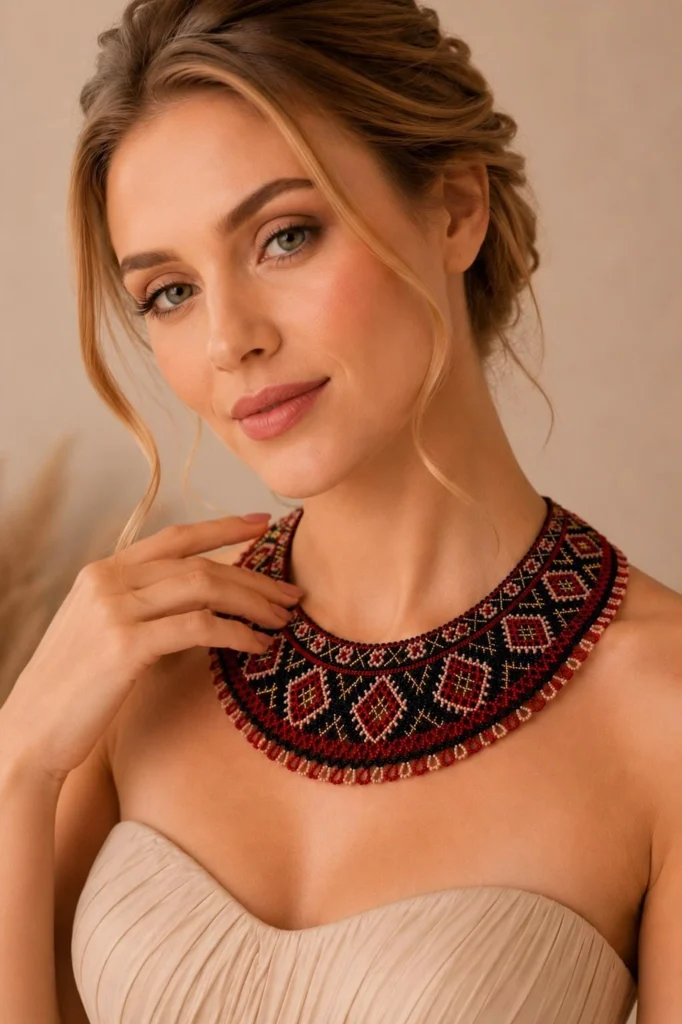
Bib necklaces cover more of the chest area, making them a true statement piece. Multiple strands of graduated bead sizes attach to a central base, fanning out like a collar. Mixed textures—matte beads next to shiny ones—add depth. This bold style suits eclectic and glam home-inspired wardrobes. Because bib necklaces are heavier, reinforce your base with sturdy wire or fabric backing. Let’s shift gears to a braiding technique from Japan.
13. Kumihimo Braided Bead Necklace
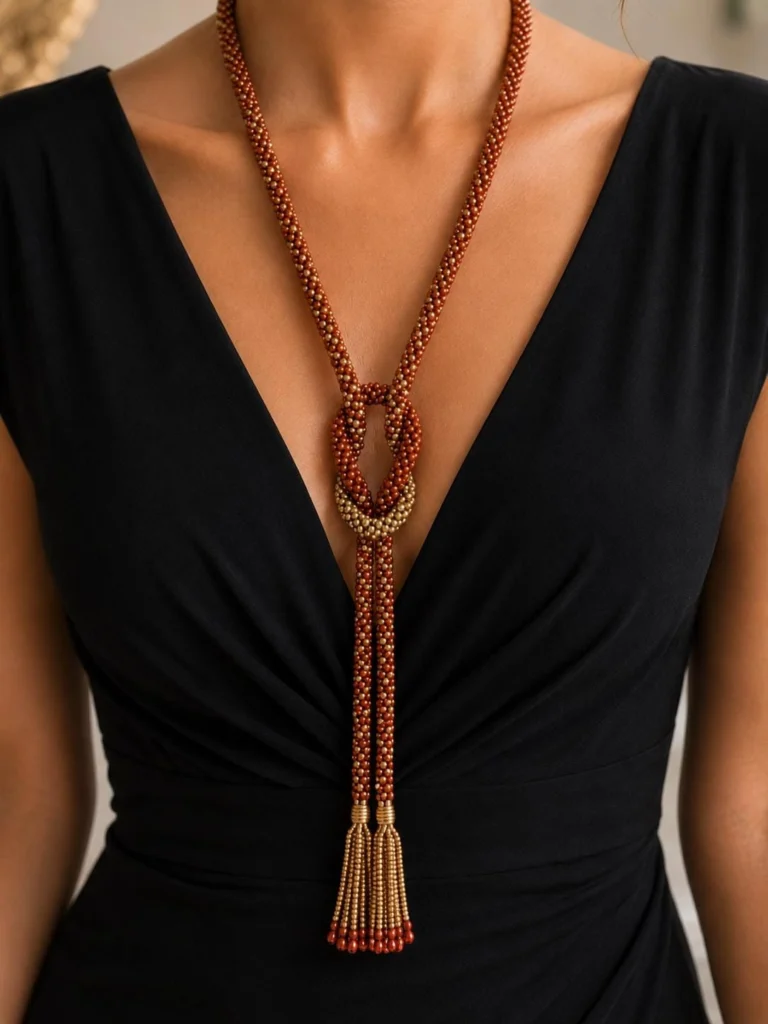
Kumihimo is a Japanese braiding technique using a foam disk to create intricate braided cords, and beads can be woven right into the braid. This method produces a rope-like necklace with impressive texture. Stick to two or three thread colors plus small seed beads for your first project. This technique suits eclectic, artistic home styles. Take it slow—kumihimo requires consistent tension, so rushing leads to uneven braids. Now, let’s look at a dramatic, asymmetrical style.
14. Beaded Lariat Necklace
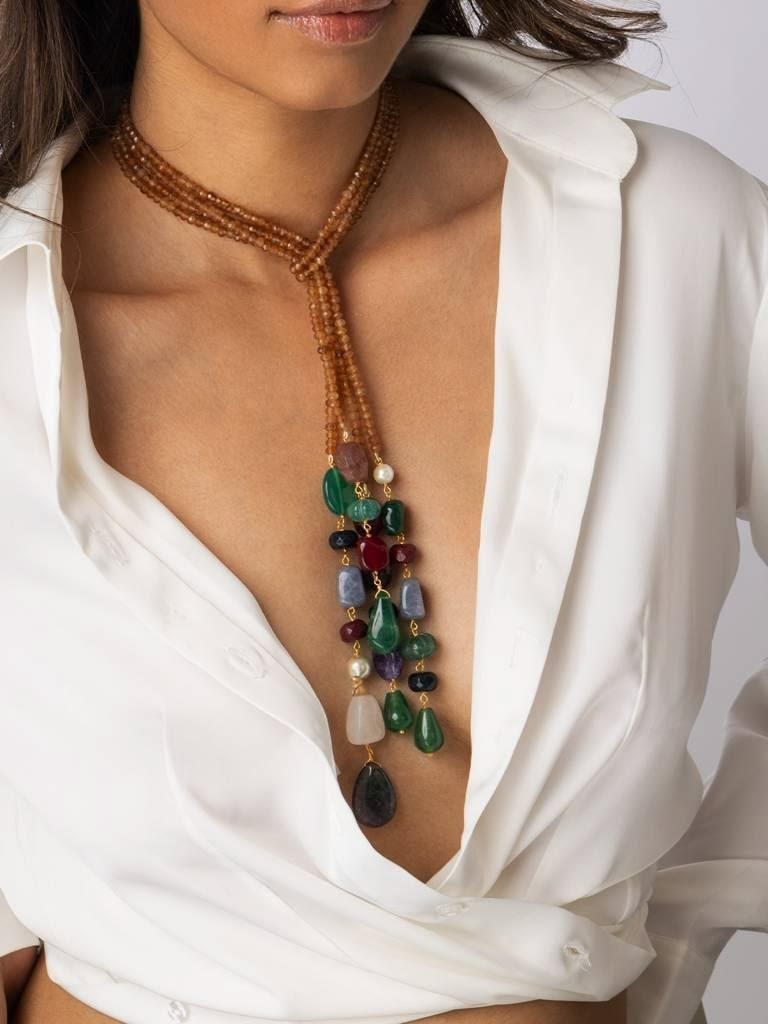
Lariats have no clasp at all; instead, they wrap or knot around the neck for an adjustable, effortless look. String beads along a long single strand, leaving the ends open to tie or loop. Neutral, earthy beads work well since the draping style already provides visual interest. This design fits bohemian and casual aesthetics. Weight the ends slightly heavier than the middle so the lariat drapes properly instead of curling oddly. Next, let’s get creative with clay.
15. Polymer Clay Bead Necklace

Making your own clay beads means unlimited color and pattern options that store-bought beads can’t match. Roll, shape, and bake polymer clay beads at home, then string them once cooled. Marbled color combinations (like terracotta and cream) look particularly trendy right now. This handmade style suits modern boho and eclectic home aesthetics. Always poke bead holes before baking, not after, or you risk cracking the clay. Let’s move to something with vintage charm.
16. Vintage Button Bead Necklace
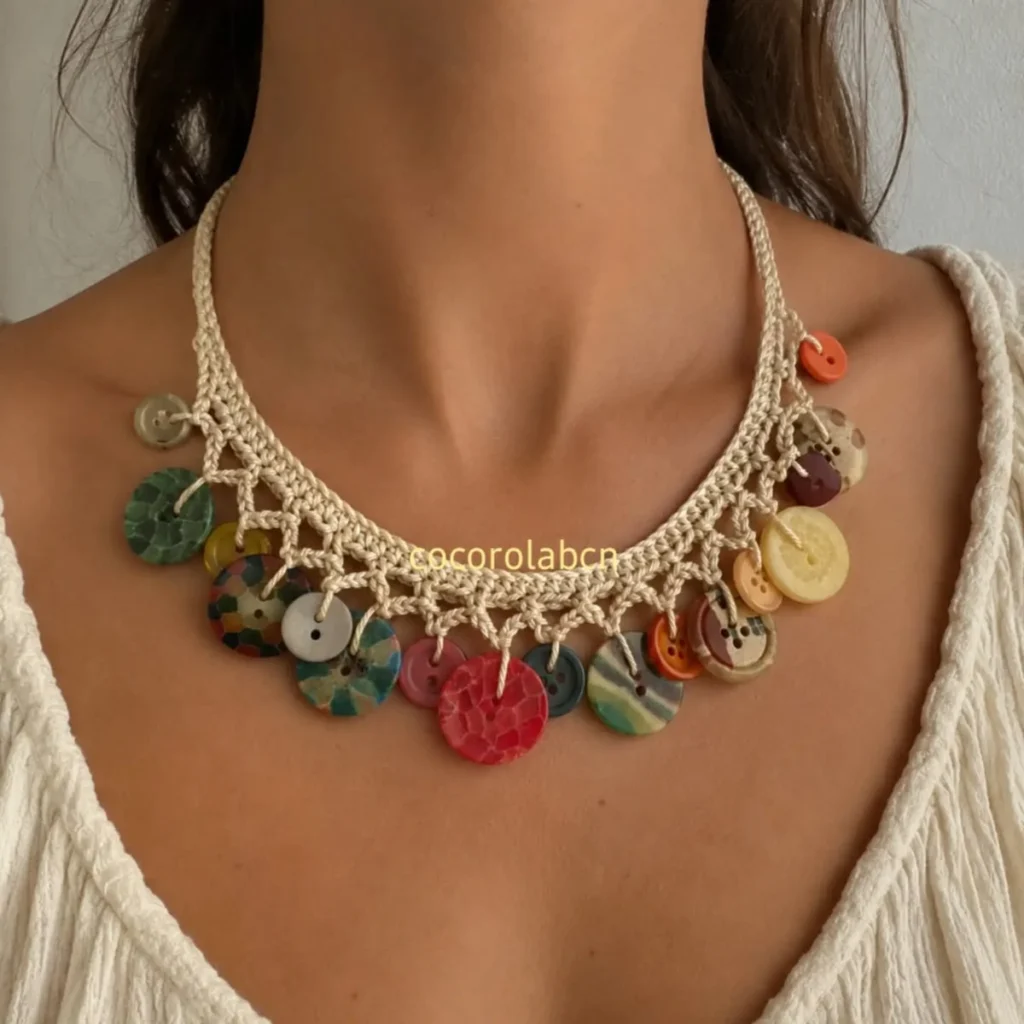
Old buttons make surprisingly beautiful necklace beads, especially mismatched ones collected from thrift stores. Thread buttons through their holes onto sturdy cord, mixing sizes and colors for a collected-over-time look. This nostalgic style fits vintage and cottagecore aesthetics perfectly. Knot between each button so they don’t clack together loudly while worn. From vintage charm, let’s simplify with everyday chain.
17. Beaded Chain Necklace
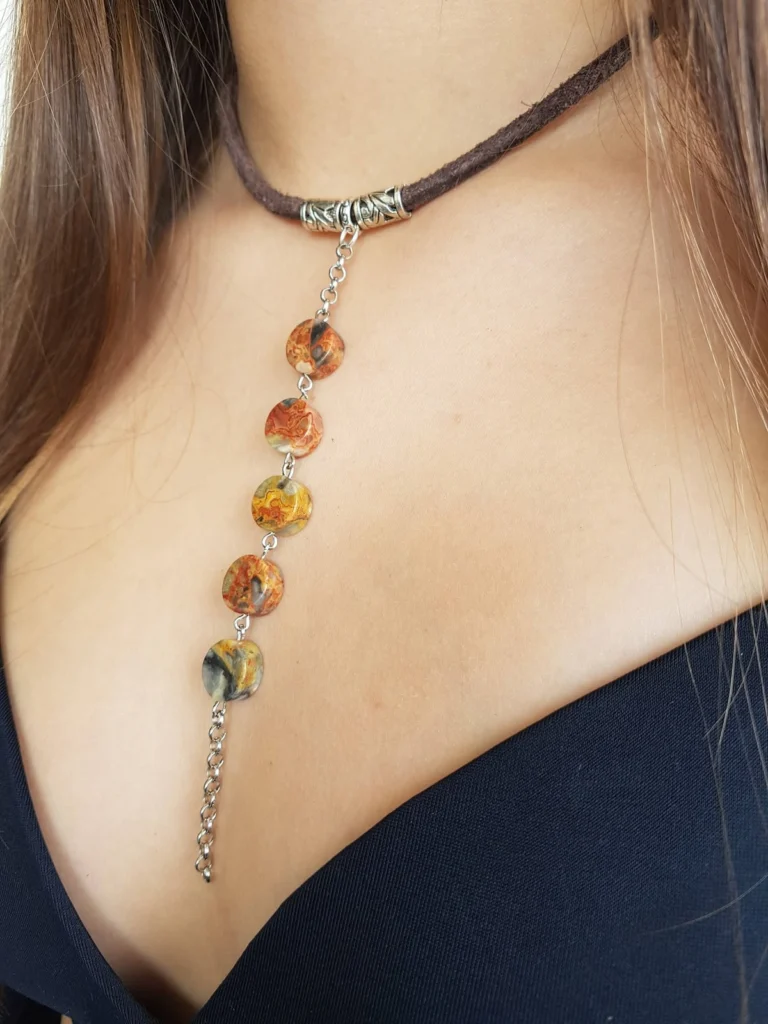
Combining metal chain sections with beaded sections creates contrast between hard and soft materials. Alternate a few inches of chain with a few inches of beads for a balanced, modern look. Gold chain with earth-toned wooden beads is a particularly popular combination right now. This style suits modern and industrial-chic aesthetics. Use jump rings to connect chain to beaded sections securely. Next, let’s talk about gradient color effects.
18. Ombre Beaded Necklace

Ombre necklaces transition from light to dark (or one color to another) gradually across the strand, creating a gorgeous gradient effect. Plan your color order before stringing—lay beads out on a tray first to visualize the transition. This style suits modern and romantic aesthetics equally well. Buying beads in bulk multi-color packs makes finding the right gradient shades much easier. Now, let’s add a functional element.
19. Beaded Locket Necklace

Adding a locket to a beaded strand combines sentimental value with handmade craftsmanship. String beads on either side of a locket pendant, keeping designs simple so the locket remains the focal point. This style suits traditional and vintage aesthetics. Choose a locket with a sturdy bail (the loop at the top) so it doesn’t snap under the necklace’s weight. Let’s go bold and colorful next.
20. Chunky Acrylic Bead Necklace
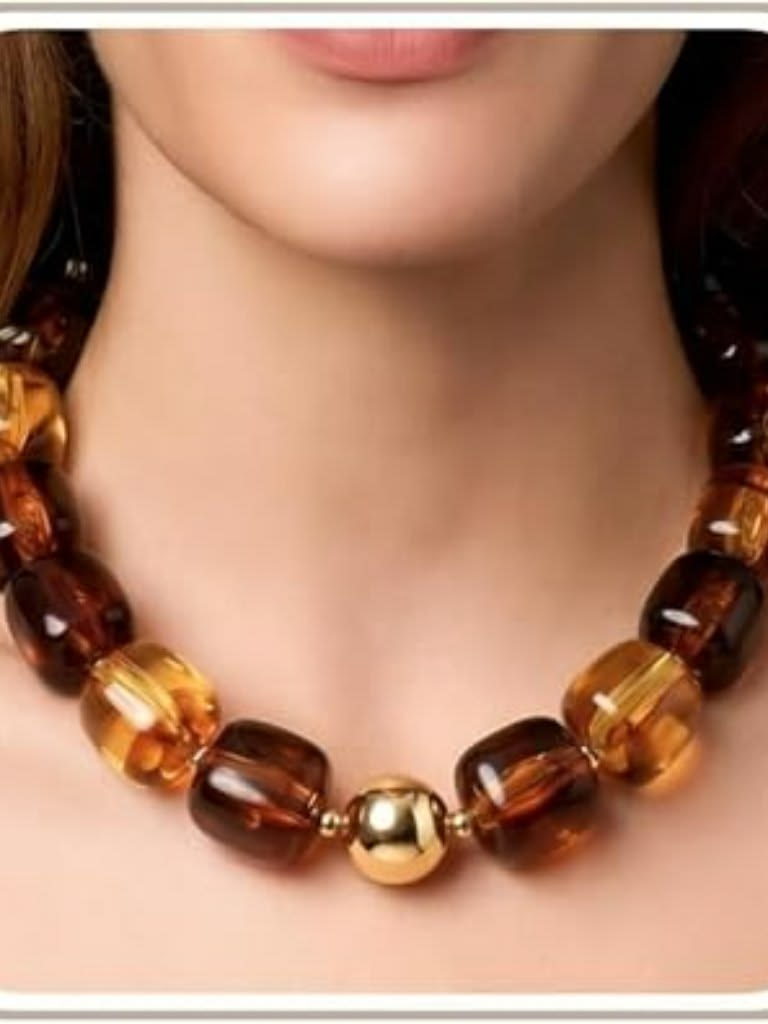
Acrylic beads are lightweight, affordable, and come in nearly every color imaginable, making them perfect for playful statement pieces. String large, colorful acrylic beads on sturdy cord for a fun, retro-inspired look. This bright style suits modern and eclectic aesthetics, especially for summer wardrobes. Because acrylic is lightweight, you can go bigger with bead size without worrying about neck strain. Next, let’s discuss rope-style designs.
21. Beaded Rope Necklace

Rope necklaces use tightly strung small beads to create a thick, flexible rope-like strand. This requires patience since you’re working with tiny beads over a long length, but the finished product looks incredibly polished. Monochromatic color schemes work best here. This style suits modern and minimalist aesthetics. Use a bead spinner tool to speed up the stringing process significantly. Now, let’s bring in some natural elements.
22. Nature-Inspired Beaded Necklace

Incorporating wood, seeds, shells, or stone beads creates an earthy, organic feel. Mix textures and natural colors—browns, greens, and creams—for a cohesive, nature-inspired palette. This style fits rustic and bohemian home aesthetics beautifully. Seal wooden beads with a light varnish to protect them from moisture and everyday wear. Finally, let’s personalize things.
23. Personalized Name Bead Necklace
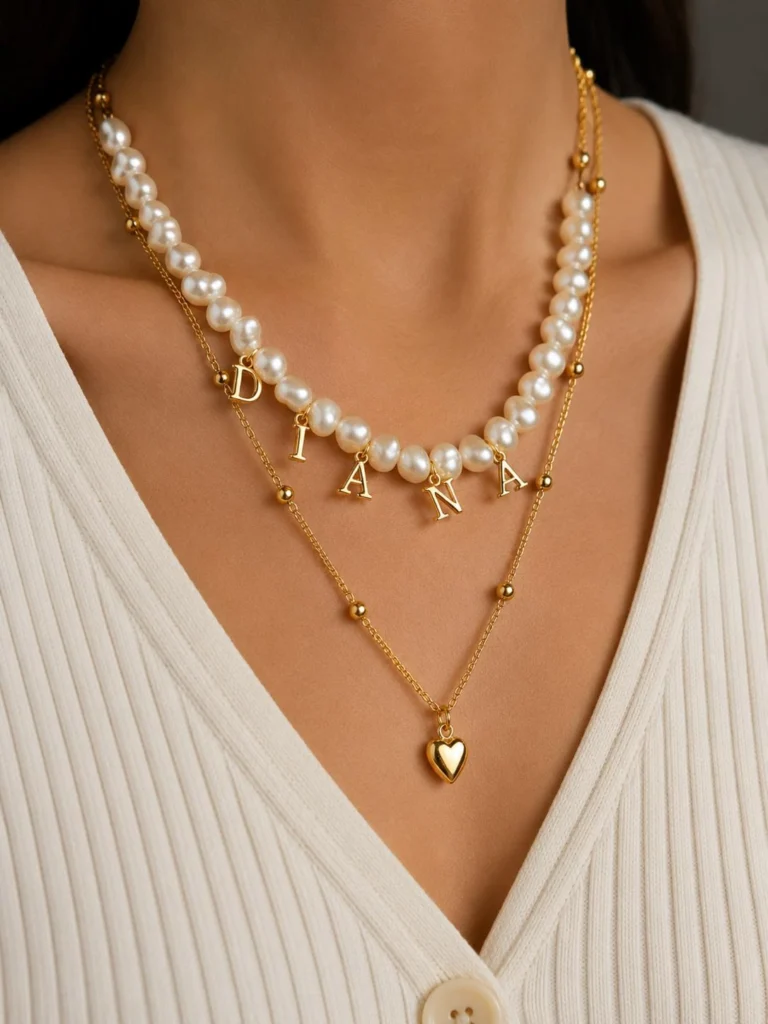
Alphabet beads let you spell out a name, word, or meaningful date, making this a favorite for gifts. Space letter beads evenly among small accent beads so the word doesn’t feel cramped. This sentimental style suits casual and modern aesthetics alike. Double-check spelling before committing to knots, since fixing typos after finishing is a hassle. With all 23 ideas covered, let’s talk materials and tools in detail.
Materials and Tools Comparison Table
| Necklace Style | Skill Level | Estimated Time | Best Stringing Material | Approximate Cost |
|---|---|---|---|---|
| Simple Strung Pearl | Beginner | 30-45 min | Silk thread | $8-15 |
| Beaded Choker | Beginner | 20-30 min | Memory wire | $5-12 |
| Multi-Strand Layered | Intermediate | 45-60 min | Beading wire | $12-20 |
| Wire-Wrapped Pendant | Intermediate | 40-60 min | Craft wire | $6-18 |
| Seed Bead Woven | Advanced | 2-4 hours | Nylon thread | $10-15 |
| Gemstone Statement | Beginner | 30-40 min | Beading wire | $15-30 |
| Beaded Tassel | Intermediate | 45-60 min | Silk cord | $10-18 |
| Macrame Combo | Advanced | 1.5-3 hours | Waxed cotton cord | $8-14 |
| Memory Wire | Beginner | 15-25 min | Memory wire | $5-10 |
| Kumihimo Braided | Advanced | 2-3 hours | Rattail cord | $12-20 |
Bead Size and Hole Diameter Reference
| Bead Type | Common Size Range | Typical Hole Size | Best Stringing Match |
|---|---|---|---|
| Seed beads | 1mm-4mm | 0.5mm-1mm | Nylon thread, fine wire |
| Pearls | 4mm-12mm | 0.8mm-1.2mm | Silk thread |
| Gemstone chips | 5mm-10mm | 1mm-1.5mm | Beading wire |
| Acrylic beads | 10mm-25mm | 2mm-3mm | Cord, elastic |
| Wooden beads | 8mm-20mm | 2mm-4mm | Waxed cord |
Tips for Success
Here are a few things I wish someone had told me before I started:
- Always pre-measure your neck-to-desired-length distance before cutting stringing material—cutting too short is a common, frustrating mistake.
- Use a bead mat or tray with grooves to keep beads from rolling away mid-project.
- Test your clasp before finishing knots, ensuring it opens and closes smoothly.
- Buy slightly more beads than you think you need, since miscounts happen often.
- Invest in a good pair of wire cutters and crimping pliers—cheap tools make clean work nearly impossible.
Common Mistakes and How to Avoid Them
Beaded Necklace Mistake
: Using thread that’s too thin for heavy beads
How to Avoid It
: Match your thread or wire gauge to bead weight; heavier stones need beading wire, not thread
Beaded Necklace Mistake
: Forgetting to knot between beads on pearl strands
How to Avoid It
: Knot after every bead so one break doesn’t scatter the entire strand
Beaded Necklace Mistake
: Overcrowding too many colors in one design
How to Avoid It
: Stick to a three-color maximum for a cohesive, intentional look
Beaded Necklace Mistake
: Skipping the crimping step
How to Avoid It
: Always use crimp beads and a crimping tool for secure, professional-looking finishes
Similar Variations You Can Try
Once you’ve tried a few of these 23 styles, consider experimenting with:
- Beaded bracelets using leftover beads from your necklace projects
- Matching earring sets made from the same color palette
- Beaded anklets for a summer-ready accessory
- Convertible necklace-to-bracelet designs using extra-long strands
- Beaded keychains as small, low-commitment practice projects
Wrapping Up
Making your own DIY beaded necklace isn’t just about saving money—though that’s a nice bonus. It’s about creating something that actually fits your style, your neck length, and your personality. I’ve walked through 23 different styles here, from beginner-friendly memory wire pieces to more advanced kumihimo braiding, so there’s genuinely something for every skill level.
Grab some beads, pick a style that speaks to you, and give it a try. That DIY beaded necklace sitting half-finished on your craft table? It’s closer to done than you think.