24 Construction Paper Flowers Ideas That’ll Make Your Home Pop With Color
I have tried literally hundreds of different tutorials on how to make flowers out of paper, and I can definitely tell which construction paper flower designs will keep their shape and look perfect throughout the day, while others simply fall apart after an hour or two. These tips are based on practical experience – not theoretical considerations – so everything mentioned below has been proven to work!
So which construction paper flower ideas should you choose? The most successful designs include paper roses, layer daisies, fringe poppies, paper peonies, and sunflower bursts. All of these designs involve simple folding, cutting, and curling procedures using nothing but construction paper, scissors, and glue.
Keep reading because today we will cover everything about all 24 designs, including tools, time frames, and common pitfalls!
Why Construction Paper Flowers Deserve a Spot in Your Home
There is something special about construction paper flowers because they are economical, will not fade, and give room for many mistakes, unlike live flowers. There was once a bouquet of flowers that I made and had lasted three years on a mantelpiece without losing any petals. While other papers such as tissue or crepe do not hold their shape very well, construction paper can be folded easily, making it ideal for people trying their hands out for the first time. These flowers can fit into any room setting; from party decorations to nursery decor and sprucing up plain-looking shelves.
1. Classic Rolled Paper Rose
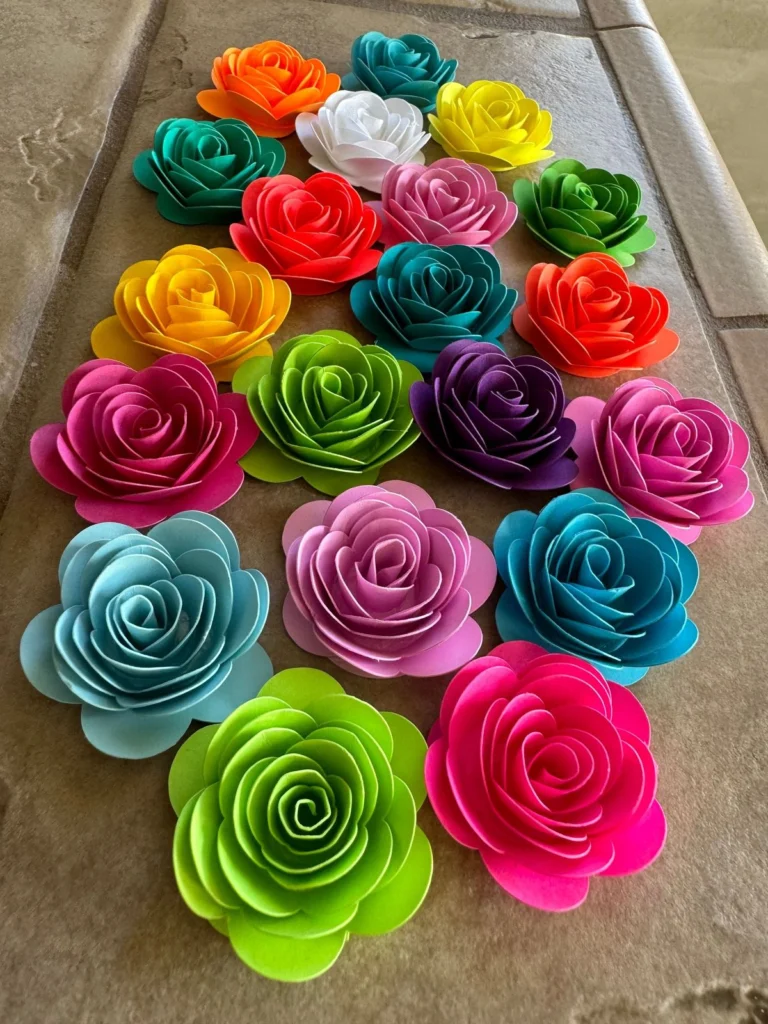
It’s easy to create roses this way since nature dictates how to do it without measuring anything precisely – just slice out spirals from your paper, roll them up from the outer edge inwardly, allowing the paper to coil into petal layers all on its own. Colors used can be any shades of dark reds, pink blush tones, or even burgundy for romance, or else opt for happy hues such as yellow and oranges. Simply glue down the base securely, insert onto a floral stem wire, and place inside a vase – perfect for farmhouse-style settings and vintage decors like mason jars or teacups. Now, onto our next flower, which is simpler still!
2. Layered Daisy Burst
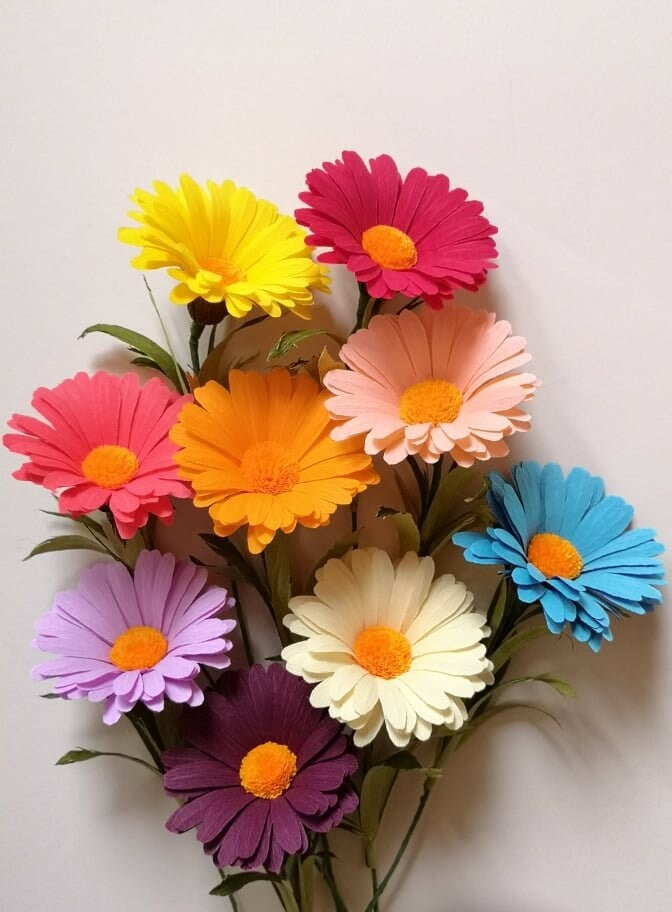
The reason why these daisies are forgiving is that the petals do not necessarily have to match each other for this flower to turn out cute. For starters, you should cut a number of layers with the petal design in white paper. Next, glue all of these together, adding an additional contrasting layer of a circular shape in yellow in the middle of your design. You need to make sure that every single layer sticks out a little bit so that your flower does not come across as being flat and one-dimensional. Here, I suggest that you use hot glue, rather than regular school glue.
3. 3D Paper Marigold

The marigold flower will add warmth to wherever it goes due to its fluffy petal formation. First, you’ll need to tear your orange or yellow paper into fringes, which you will then roll up in spiral form on top of an inner base. Essentially, you create a textured flower that is reminiscent of making paper pompoms, except more compact. The result is perfect for creating autumnal arrangements. Try pairing the marigold with shades of green and brown to make an arrangement suitable for your Thanksgiving dinner table. Bohemian and rustic styles of decorating will particularly appreciate this earthy element.
4. Simple Paper Tulip
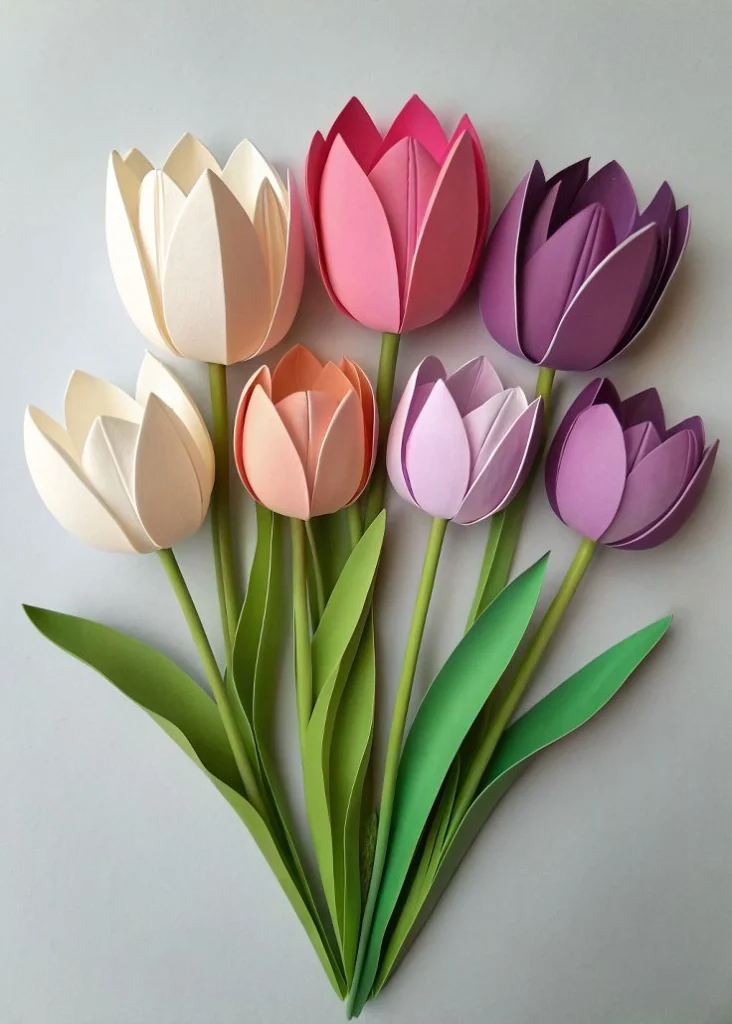
Another feature about tulips is that they can be made within seconds compared to other paper blooms. In order to accomplish this task, simply cut the basic shape of a tulip petal. Afterwards, use your hands to gently round out the curves on each petal. Next, glue the petals onto the base cone structure in groups of three or five depending on what size of flower you desire. Colors such as reds, pinks, and purples will give off that spring feel while creating tulips using white petals and green stem pieces creates an elegant appearance. Now that we have covered tulips, let’s move onto something grander.
5. Giant Paper Peony

Giant peonies turn heads because of their sheer size and layered complexity, making them a favorite for photo backdrops and statement wall art. You’ll need several dozen petal cutouts in graduating sizes, glued in a spiral from largest to smallest toward the center. Blush, coral, and ivory shades give the most realistic peony look. Because of their size, these work best mounted on walls or propped in oversized floor vases rather than small tabletops. Eclectic and glam-style homes love these as focal points. Next, we’ll shrink things back down with a flower that’s quick to assemble in multiples.
6. Accordion-Fold Carnation
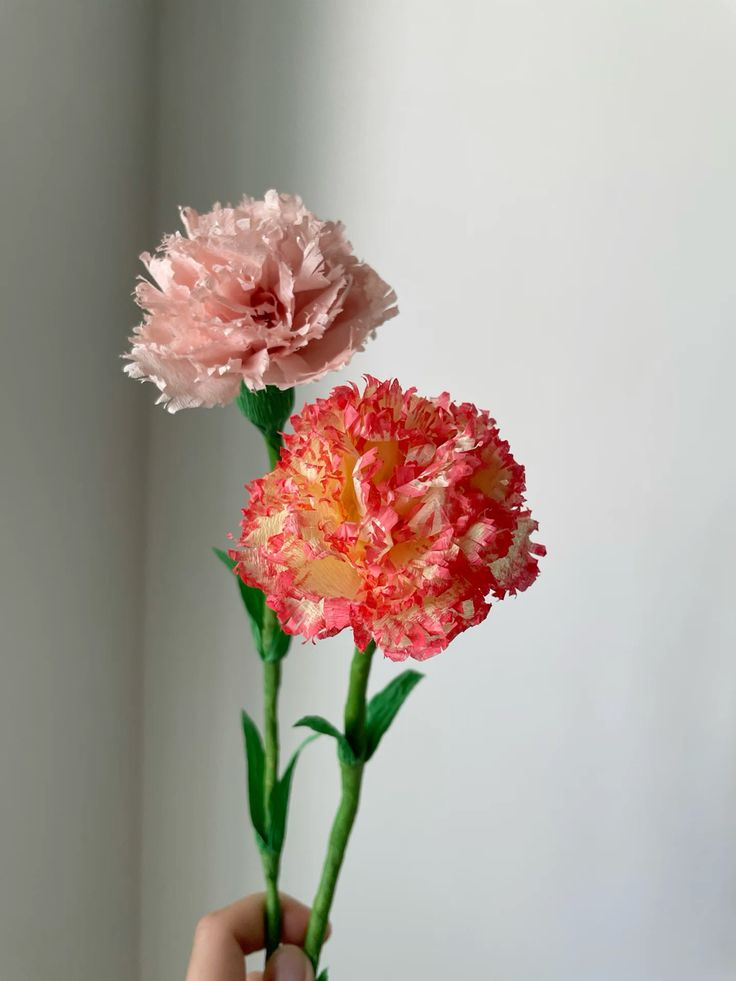
Carnations get their signature ruffled texture from accordion folding, which is honestly one of the most satisfying techniques in paper crafting. Fold a strip of paper back and forth like a fan, then gather the middle and fluff out both sides to create the ruffled bloom. Bright pinks and two-tone color combos look especially striking with this method. These carnations pair well with traditional and shabby-chic decor styles. A quick tip: use slightly stiffer cardstock for the accordion fold since thin paper tends to tear at the crease. Moving on, let’s talk about a flower that mimics summer’s most recognizable bloom.
7. Paper Sunflower
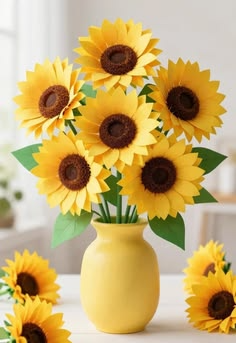
Sunflowers bring instant cheer to kitchens and sunrooms. Cut pointed yellow petals and arrange them around a textured brown center, which you can create by scrunching small paper circles or using a fringe-cutting technique for added realism. This flower looks fantastic in farmhouse kitchens, especially displayed in galvanized metal buckets. A helpful tip is to layer two rows of petals at slightly different angles for a fuller look. Since sunflowers are naturally bold, they work as standalone accent pieces rather than blending into a bouquet. Next, we’ll explore a design with a completely different texture: fringed and feathery.
8. Fringed Poppy

Poppies have this delicate, papery texture in real life, and fringing the edges of your construction paper petals recreates that look surprisingly well. Cut wide petal shapes, then use scissors to create thin fringe along just the top edge before curling it outward with a pencil. Reds and oranges with black paper centers give the most authentic poppy appearance. This design fits bohemian and eclectic spaces, especially in loose, wild-looking arrangements. Here’s a tip: don’t over-fringe, or the petals lose structural integrity. Now let’s look at a spiral technique that creates an entirely different rose variation.
9. Spiral-Cut Rose
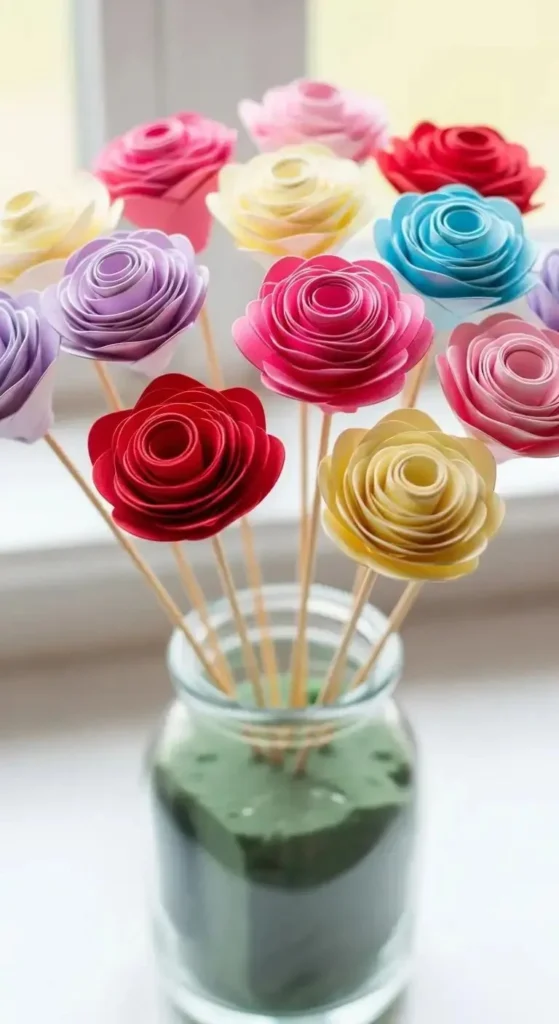
Unlike the rolled rose, this version starts as one continuous spiral cut from a paper circle, which you then roll from the outer edge to the center in one motion. It’s faster than the layered method and creates a tighter, more compact bloom. This works great for smaller crafts like gift toppers or napkin ring decorations. Soft pastels and jewel tones both work beautifully here. Traditional and romantic-themed rooms benefit from clusters of these smaller roses. Next, let’s shift toward flowers better suited for spring wall displays.
10. Cherry Blossom Cluster

Cherry blossoms are all about delicate small petals grouped together on branches, making them ideal for wall art or window displays. Cut small five-petal flower shapes from pale pink paper, then glue clusters of them onto brown paper branches or actual twigs. This design brings an airy, Japanese-inspired aesthetic to minimalist and zen-style rooms. A practical tip: vary the petal sizes slightly so the branch looks more natural rather than mechanically repeated. This is a fantastic project for spring decorating. Now let’s move to a taller, more elegant flower option.
11. Paper Lily

Lilies have a distinctive trumpet shape that adds elegance to any display. Curl six petal shapes outward using a pencil or dowel, then glue them around a central tube shape with paper stamens poking out from the center. White and soft pink lilies suit traditional and formal dining rooms particularly well. These look stunning in tall, slender vases as a centerpiece. A helpful tip: reinforce the base with a small paper cone before attaching petals so the flower holds its trumpet shape. Next, we’ll build something fuller and rounder.
12. Hydrangea Bunch
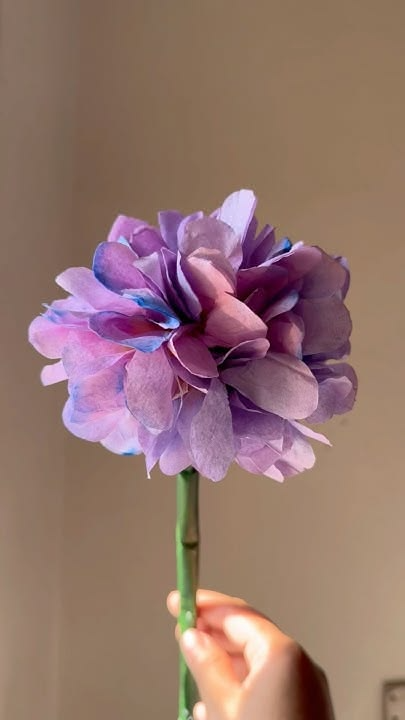
Hydrangeas are made of dozens of tiny four-petal flowers clustered into one large, round bloom, which makes them time-consuming but incredibly rewarding to display. Cut small flower shapes in blue, purple, or white, then glue them densely onto a foam or paper ball base. This design fits cottage and traditional interiors beautifully, especially in wide-mouth vases. My tip: work in sections rather than trying to cover the whole ball at once, or you’ll lose track of gaps. Let’s transition now to a flower with a striking trumpet-and-frill combination.
13. Paper Daffodil

Daffodils combine a flat outer petal ring with a ruffled center trumpet, giving them a unique two-part construction. Cut six pointed petals in yellow or white, then create a small paper cylinder with fringed edges for the center trumpet, gluing it directly onto the petal base. This design brightens up spring tablescapes and pairs nicely with green paper stems in a cluster arrangement. Farmhouse and cottage homes suit this cheerful bloom well. Now, let’s look at a flower that requires a bit more folding precision.
14. Layered Paper Lotus

Lotus flowers use a symmetrical layering technique, with pointed petals arranged in concentric rings around a flat center. Cut three to four layers of petals in graduating sizes, curling the tips slightly upward before stacking and gluing them together. Soft pinks and whites give the most authentic lotus appearance. This design fits zen, spa-inspired, or Asian-influenced decor themes, especially floating in a shallow bowl display. A tip worth remembering: keep the center flat rather than domed for a more realistic lotus silhouette. Next, we’ll explore an exotic bloom with curled, unique petals.
15. Paper Orchid

Orchids have irregular, curved petals that make them look more sculptural than symmetrical. Cut elongated petal shapes and curl them individually using scissors or a curling iron technique, then arrange them asymmetrically around a small center. Purple, white, and speckled color patterns give the most realistic orchid look. This design suits modern and tropical-themed rooms, especially displayed on a single stem in a minimalist vase. My tip: don’t rush the curling step, since uneven curls actually make the flower look more natural. Now let’s shift from single blooms to full arrangements.
16. Paper Flower Wreath

A wreath combines multiple flower types glued around a circular base, creating a versatile door or wall decoration. Mix roses, daisies, and greenery cutouts for texture variety, gluing them onto a cardboard or foam ring base. This project works for literally any season depending on your color choices. Farmhouse and traditional entryways benefit most from this display. A tip: attach flowers in clusters of three rather than spacing them evenly, since odd-numbered groupings look more organic. Next, let’s talk bouquets you can actually hold or gift.
17. Paper Flower Bouquet

Bouquets combine five to seven different flower designs on wire stems, wrapped together with floral tape or ribbon. This is a great project for using up leftover paper scraps from other projects on this list. Coordinate colors within the same family, like all warm tones or all pastels, for a cohesive look. These bouquets suit any home style and make excellent gifts since they never need water. My tip: vary stem heights slightly so the bouquet doesn’t look flat when viewed from the side. Now let’s hang things up instead of setting them down.
18. Hanging Paper Flower Garland

Garlands string multiple flowers along twine or ribbon, creating a festive decoration for parties or nurseries. Punch a small hole in the back of each flower, then thread them onto string with spacing between each bloom. Bright, mixed colors work well for celebrations, while monochrome garlands suit more subtle home decor. This works especially well for boho and eclectic party setups. A tip: alternate flower sizes along the string to avoid a repetitive, uniform pattern. Next, let’s mount flowers directly onto the wall.
19. Paper Flower Wall Art
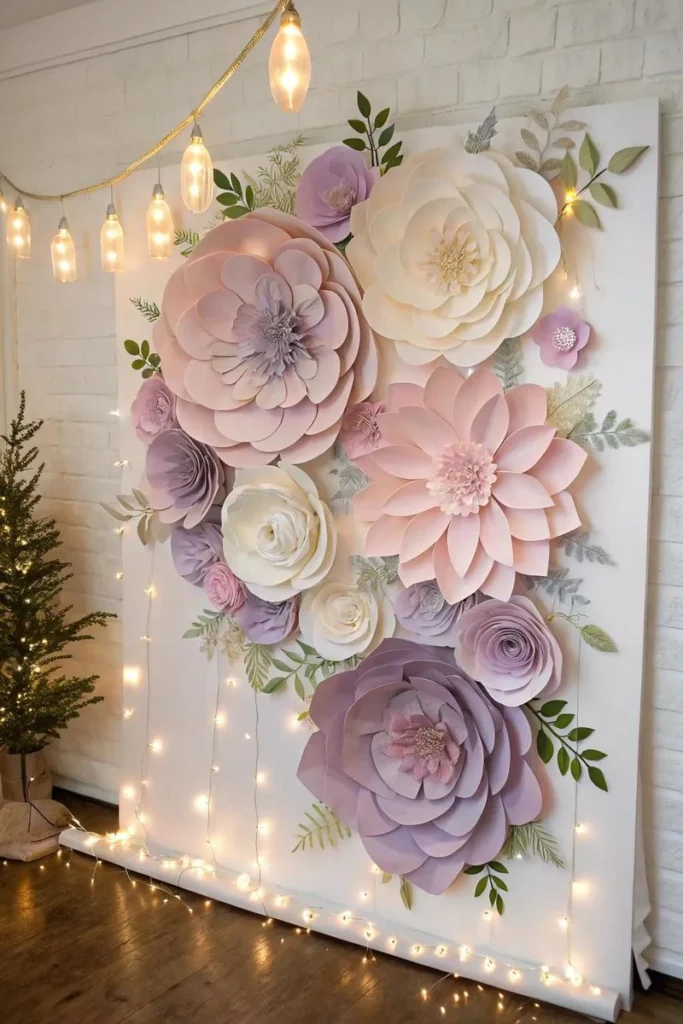
Wall art arrangements involve gluing dozens of flowers directly onto a canvas, wood board, or even the wall itself in a cascading or clustered pattern. This creates a dramatic, gallery-worthy statement piece for living rooms or bedrooms. Mixing flower types and sizes adds visual interest, while sticking to one or two colors keeps it from feeling chaotic. Modern, glam, and eclectic homes all benefit from this bold display. My tip: plan your layout on the floor first before gluing anything to the final surface. Now, let’s build something for the dinner table.
20. Paper Flower Centerpiece
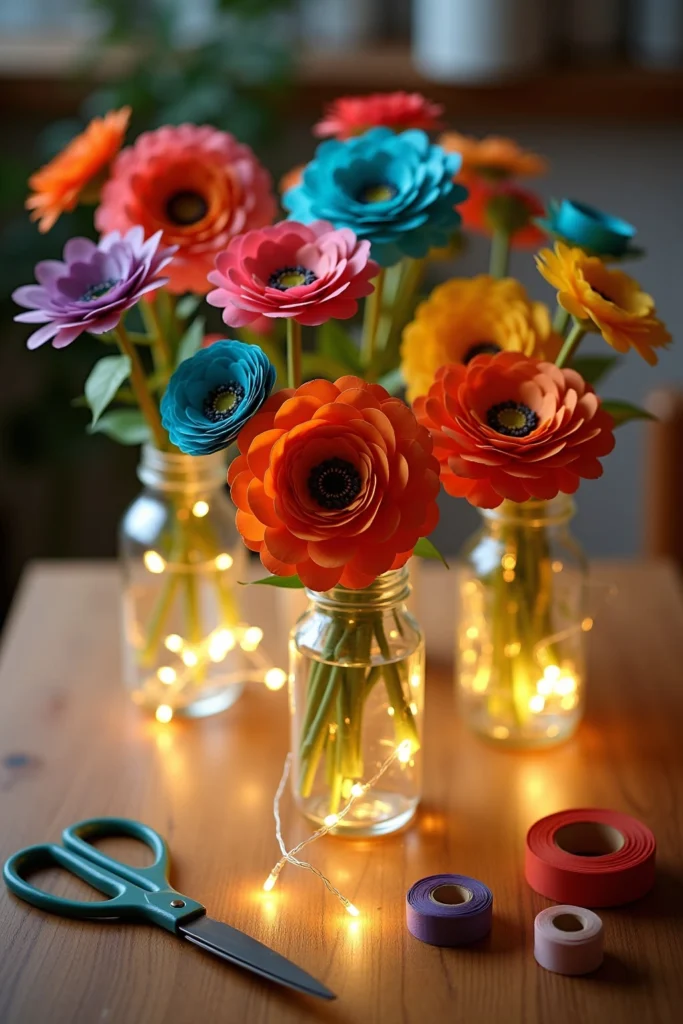
Centerpieces arrange flowers in a low, wide formation, often around a candle or in a shallow bowl. Combine three or four flower types with varying heights for dimension, and add paper leaves to fill gaps. This works wonderfully for dinner parties, weddings, and holiday tables. Traditional and formal dining rooms suit centerpieces with roses and lilies, while casual spaces work well with daisies and sunflowers. A tip: keep the arrangement lower than eye level so guests can still see each other across the table. Next, let’s add a trendy twist with succulents.
21. Mini Paper Succulents with Flowers

Pairing paper succulents with small flowers creates a modern, textured display that’s currently trending in home decor. Layer rounded petal shapes for the succulents and combine them with mini roses or daisies in a small terrarium-style pot. Greens, dusty blues, and soft pinks give this arrangement a fresh, contemporary feel. Modern and minimalist homes love this low-maintenance look. My tip: use sandpaper texture or crinkled paper for succulents to mimic their natural rough surface. Now, let’s move toward wearable paper crafts.
22. Paper Flower Crown

Flower crowns combine several small blooms glued or wired onto a headband or wire circle, perfect for birthday parties, photoshoots, or costume events. Use lightweight flowers like daisies and small roses to avoid weighing down the crown. Pastel and bright color combos both work depending on the occasion. This project isn’t exactly home decor, but it makes a fantastic display piece when hung on a wall hook when not worn. A tip: reinforce the headband base with extra tape so it holds up under the weight of multiple flowers. Let’s move to smaller decorative accents next.
23. Paper Flower Gift Toppers

Small paper flowers glued onto gift boxes or wrapped presents add a handmade touch that store-bought bows can’t match. Use spiral roses or mini daisies since they’re compact and quick to produce in bulk. Match the flower color to your wrapping paper for a coordinated look, or contrast intentionally for visual pop. This works for any gifting occasion and suits every home style since it’s a temporary accent. My tip: attach flowers with double-sided tape rather than glue for cleaner, mess-free application. Finally, let’s look at a display option for preserving your best creations.
24. Paper Flower Shadow Box

A shadow box displays your favorite paper flowers behind glass or an open frame, turning them into permanent wall art. Arrange flowers in a pleasing composition, glue them to the backing board, then seal the box shut. This protects delicate paper crafts from dust and damage while showcasing them prominently. Eclectic, modern, and gallery-wall style homes benefit most from this display method. A tip: add small paper butterflies or leaves for extra depth and visual storytelling within the box.
Materials and Tools Comparison Table
| Flower Type | Difficulty Level | Time Estimate | Best Paper Weight | Recommended Adhesive |
|---|---|---|---|---|
| Rolled Rose | Easy | 10-15 min | Medium (65lb) | Hot glue |
| Layered Daisy | Easy | 8-10 min | Medium (65lb) | School glue |
| Marigold | Moderate | 20-25 min | Medium-heavy | Hot glue |
| Tulip | Easy | 5-8 min | Medium (65lb) | School glue |
| Giant Peony | Hard | 40-50 min | Light-medium | Hot glue |
| Carnation | Moderate | 15-20 min | Medium-heavy | Hot glue |
| Sunflower | Moderate | 20 min | Medium (65lb) | Hot glue |
| Fringed Poppy | Moderate | 15 min | Medium (65lb) | School glue |
| Spiral Rose | Easy | 5-10 min | Medium (65lb) | Hot glue |
| Lotus | Hard | 30 min | Medium-heavy | Hot glue |
| Orchid | Hard | 25-30 min | Light-medium | Hot glue |
| Hydrangea Bunch | Hard | 45-60 min | Light (45lb) | School glue |
Color Palette Guide by Room Style
| Home Style | Recommended Colors | Suggested Flowers |
|---|---|---|
| Farmhouse | Cream, mustard, sage green | Sunflower, daisy, marigold |
| Coastal | Soft blue, white, seafoam | Hydrangea, daisy, lily |
| Boho/Eclectic | Rust, deep pink, gold | Poppy, marigold, wildflower mix |
| Modern/Minimalist | White, blush, single-tone | Tulip, orchid, spiral rose |
| Traditional | Burgundy, ivory, forest green | Rose, carnation, lotus |
Tips for Success
Getting these flowers to look polished instead of “craft-project sloppy” comes down to a few habits I picked up through plenty of trial and error.
- Always curl petal edges with a pencil, dowel, or even a ballpoint pen for natural-looking curves instead of flat, stiff petals.
- Cut multiple petals at once by stacking and folding paper before cutting, saving significant time on bulk projects.
- Use floral wire wrapped in green paper tape for realistic-looking stems that hold their shape in arrangements.
- Work over parchment paper when using hot glue to avoid sticky messes on your table.
- Store finished flowers flat in a box if you’re not displaying them immediately, since bending can crease petals permanently.
Common Mistakes and How to Avoid Them
Definition List
Using paper that’s too thin
: Thin paper collapses under glue weight or fails to hold curls. Stick to 65lb cardstock or heavier for most designs.
Rushing the glue-drying process
: Handling petals before glue sets fully causes shifting and misshapen blooms. Give at least 60 seconds per layer before moving on.
Cutting petals with no size variation
: Uniform petal sizes make flowers look artificial and flat. Vary sizes slightly across layers for a natural gradient.
Overloading centerpieces with too many colors
: Mixing more than three colors in one arrangement often looks chaotic rather than intentional. Stick to a limited palette.
Skipping the stem reinforcement step
: Flowers without wired or reinforced stems droop over time, especially in taller arrangements.
Similar Variations You Can Try
If you enjoyed these 24 ideas, here are a few offshoot projects worth exploring:
- Combine construction paper flowers with real dried branches for a mixed-media centerpiece.
- Create ombre-colored flowers by gradually blending shades across petal layers.
- Make magnetic paper flowers for a fun refrigerator or locker decoration.
- Try scented paper flowers by lightly spraying petals with essential oils for a subtle fragrance.
- Build seasonal flower sets, like poinsettias for winter or dogwood blossoms for spring, using the same core techniques covered above.
Wrapping It Up
I’ve genuinely enjoyed testing these construction paper flowers ideas over the years, and I hope this guide saves you the trial-and-error I went through myself. From simple rolled roses to elaborate shadow box displays, there’s a project here for every skill level and every room in your house.
Whether you’re decorating for a season, a party, or just want something colorful that never wilts, these construction paper flowers ideas give you endless ways to brighten your space without spending a fortune.