21 Scrap Wood Storage Ideas That Actually Work
I’ve spent years knee-deep in wood shavings and offcuts, testing storage solutions in my own garage workshop until I found what actually sticks. This guide pulls from real trial-and-error experience, not just theory, so you get solutions that hold up under actual shop conditions.
So what’s the best way to store scrap wood? The best scrap wood storage combines vertical racks for long pieces, bins or crates for small offcuts, and mobile carts for flexibility. Sorting by size and wood type prevents clutter and saves time when searching for the right piece later.
Stick around, though, because I’m not stopping at the basics. I’ll walk you through 21 different setups, share a few tables comparing materials and costs, and point out mistakes I made so you don’t have to repeat them.
Why Scrap Wood Storage Matters More Than You Think
Here’s the thing nobody tells you when you start woodworking: the scrap pile grows faster than the finished projects. I learned this the hard way. My garage turned into a wood jungle within six months. Boards leaning everywhere. Small offcuts buried under sawdust. I couldn’t find a 2×4 stub to save my life.
Good scrap wood storage isn’t just about tidiness. It’s about saving money (you’ll actually use that wood instead of buying new), saving time, and honestly, saving your sanity. A cluttered shop slows down every single project. Let’s fix that.
1. Vertical Wall-Mounted Rack

Nothing beats a vertical wall-mounted rack when floor space is tight. This setup uses horizontal arms bolted into wall studs, letting long boards lean upright against the wall instead of sprawling across your floor. The design works because gravity does most of the holding, and you can see every piece at a glance.
For furniture selection, go with 2×4 lumber for the arms and heavy-duty brackets rated for at least 50 pounds per arm. Stick to a natural wood finish or a coat of matte black paint if you want it to blend with an industrial-style garage. Space the arms 12 to 16 inches apart vertically.
This suits garages with exposed studs and works beautifully in farmhouse or industrial-style workshops. Next up, let’s talk about something that rolls.
2. Rolling Wood Cart
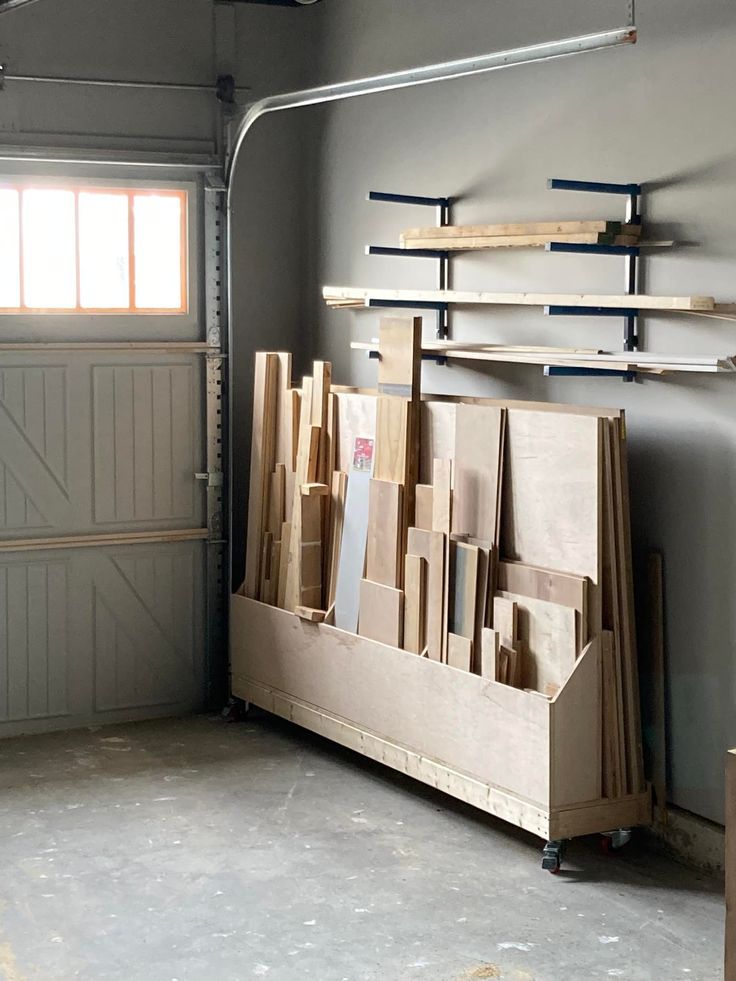
A rolling cart changes everything when you need mobility. I built mine from an old dresser frame with casters bolted underneath, and now I wheel my offcuts wherever the project happens to be that day. The core idea here is simple: combine vertical dividers with locking wheels so the cart stays put when you need it stationary.
Use 3/4-inch plywood for the dividers since it’s sturdy enough to hold weight without warping. Paint the frame a bold color like red or yellow so it’s easy to spot in a cluttered shop. Locking casters rated for at least 200 pounds combined weight are non-negotiable.
This idea fits modern and minimalist workshops especially well since everything tucks away neatly. Now, let’s shrink things down a bit.
3. Under-Workbench Bins
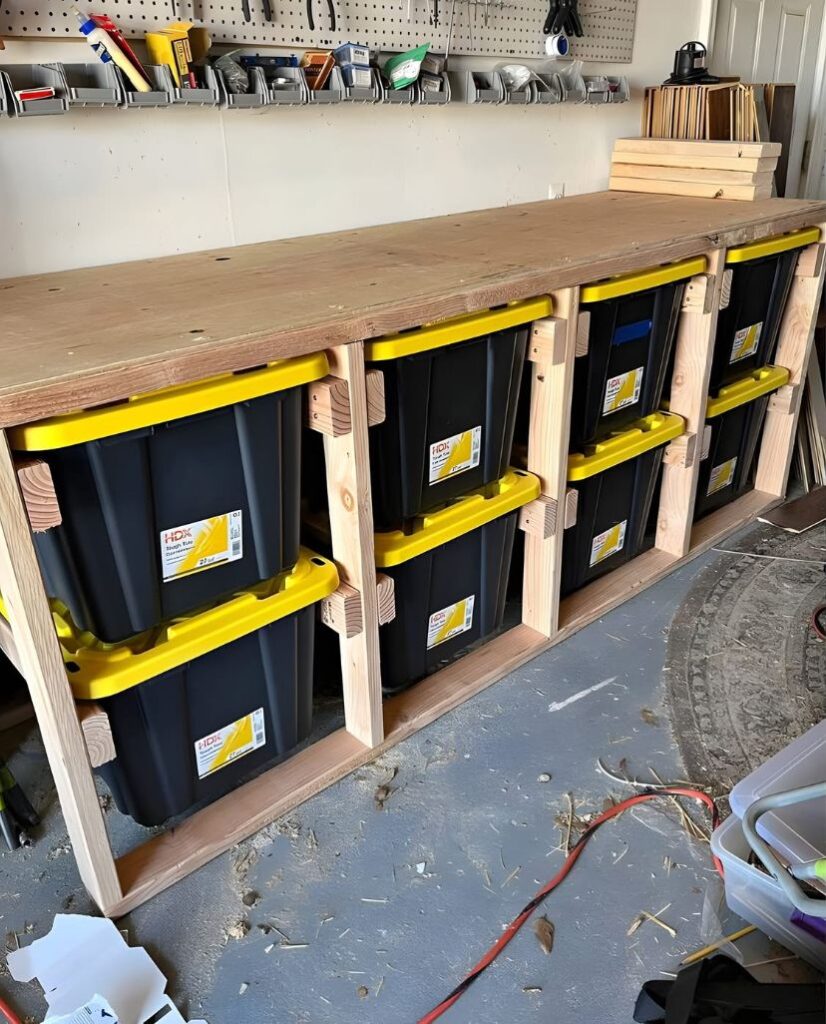
Your workbench has dead space underneath it, and that space is basically begging for bins. This setup slides plastic or wooden bins directly under your bench, sorted by wood type or size. The genius part is that it uses space you’re already not using for anything else.
Pick stackable bins with open fronts so you can grab wood without pulling the whole bin out. Clear plastic bins let you see contents instantly, while wooden crates add a rustic touch if that’s your workshop’s vibe. Label each bin by size range, like “under 6 inches” or “6 to 12 inches.”
This works in almost any shop style, but it’s especially handy in smaller spaces like apartment garages or shared workshops. Moving on to something with more structure.
4. PVC Pipe Sorter

PVC pipes mounted horizontally create individual slots for dowels, thin strips, and small scraps. Cut sections of 4-inch PVC pipe, mount them in a row on a wooden frame, and each pipe becomes its own storage tube. This method keeps thin, awkward pieces from tangling together or getting lost.
Choose PVC in white or gray, or spray paint them for a more finished look. Mount the frame at eye level so you’re not bending over constantly. This is a budget-friendly option since PVC scraps often cost next to nothing at hardware stores.
It’s a favorite in utilitarian and industrial-style setups. Here’s a similar concept but built bigger.
5. Pallet Wood Storage Rack
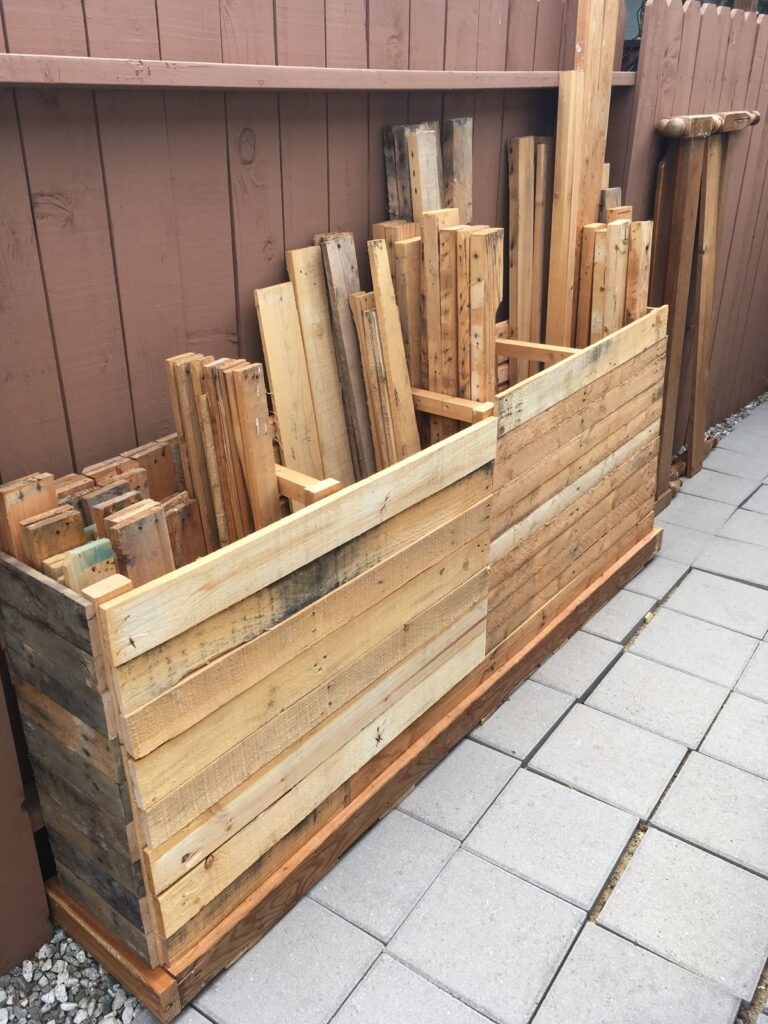
Repurposed pallets make surprisingly sturdy storage racks, and the rustic look adds character to any shop. Break down a pallet, then reassemble the boards into a slanted rack that holds larger scraps at an angle. Gravity keeps everything settled while the angled design makes pieces easy to grab.
Sand rough edges before use, since pallet wood tends to splinter. Leave the natural weathered finish for a rustic farmhouse feel, or stain it darker for a more polished industrial look. This rack works best against a wall with at least 4 feet of clearance.
This idea shines in farmhouse-style garages and workshops that lean into a reclaimed, DIY aesthetic. Let’s go overhead next.
6. Overhead Ceiling Rack

Ceiling space is criminally underused in most workshops. An overhead rack made from 2x4s suspended by heavy-duty chains or brackets stores long boards horizontally above head height. This frees up wall and floor space entirely for other tools or workstations.
Use galvanized chain rated for at least 100 pounds per link connection, and space the support beams every 3 feet for stability. Keep the wood finish natural since this rack usually sits high enough that appearance matters less than function.
This setup works wonders in workshops with high ceilings, especially detached garages or barns. Speaking of mobility, here’s another cart variation.
7. Mobile A-Frame Cart

An A-frame cart on wheels holds sheet goods and long scraps vertically, leaning against a central frame from both sides. This design doubles your storage capacity compared to a single-sided rack, and the wheels mean you can push it out of the way when it’s not needed.
Build the frame from 2x4s in an A-shape, add a plywood base, and attach four locking casters. This works great painted in a neutral gray or left unfinished for a raw wood look. Keep the angle around 15 degrees so pieces don’t slide out.
This fits well in modern workshops that prioritize clean lines and mobility. Now let’s talk cubbies.
8. Cubby Hole Shelf System
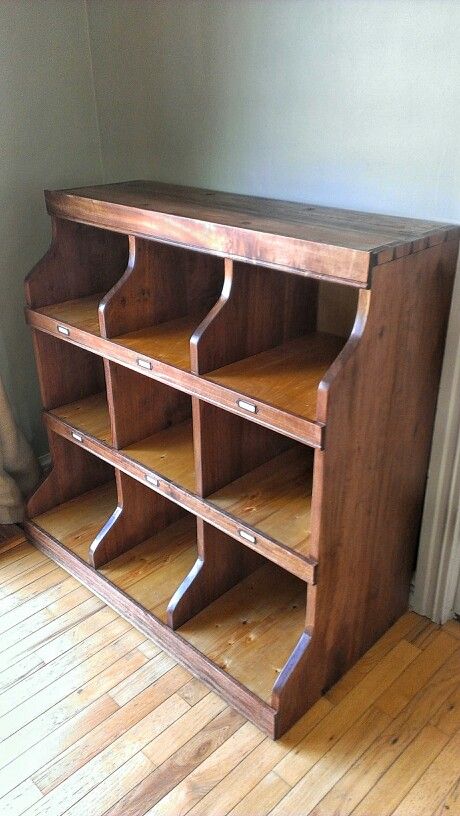
A cubby system with individual square compartments organizes scraps by category better than almost any other method. Build a grid of squares roughly 12×12 inches using plywood, then slot wood pieces into whichever cubby matches their size or type. Each cubby acts like its own mini storage unit.
Use 1/2-inch plywood for the dividers to keep the whole unit lightweight but sturdy. Paint alternating cubbies in different colors for a fun, organized look, or keep it monochrome for a cleaner appearance. Label each section with chalk paint squares for easy identification.
This system works beautifully in eclectic or colorful workshop designs. Let’s look at something with buckets next.
9. Bucket Storage Stand

Five-gallon buckets mounted on a simple wooden stand create instant vertical storage bins for smaller scraps. Build a frame with circular cutouts sized to hold standard buckets snugly, then slide buckets in and out as needed. This method is cheap, fast to build, and endlessly customizable.
Use leftover 2x4s for the frame and any spare buckets you’ve got lying around. Paint the buckets different colors to represent different wood types, like oak, pine, or plywood scraps. This stand works well at around waist height for easy access.
This idea suits casual, budget-conscious workshops without sacrificing organization. Next, we’re sliding into drawers.
10. Sliding Drawer System

A sliding drawer system built into an old cabinet frame keeps scraps hidden and dust-free. Each drawer slides out on rails, revealing organized compartments sorted by size or wood species. This method protects wood from moisture and dust better than open storage options.
Repurpose an old dresser or build drawers from 3/4-inch plywood with metal drawer slides rated for at least 50 pounds. Stain the exterior to match your existing shop furniture for a cohesive look. Label each drawer front with a chalkboard label for quick sorting.
This fits traditional or farmhouse-style workshops that favor enclosed storage over open shelving. Let’s tuck into corners now.
11. Corner Wood Rack
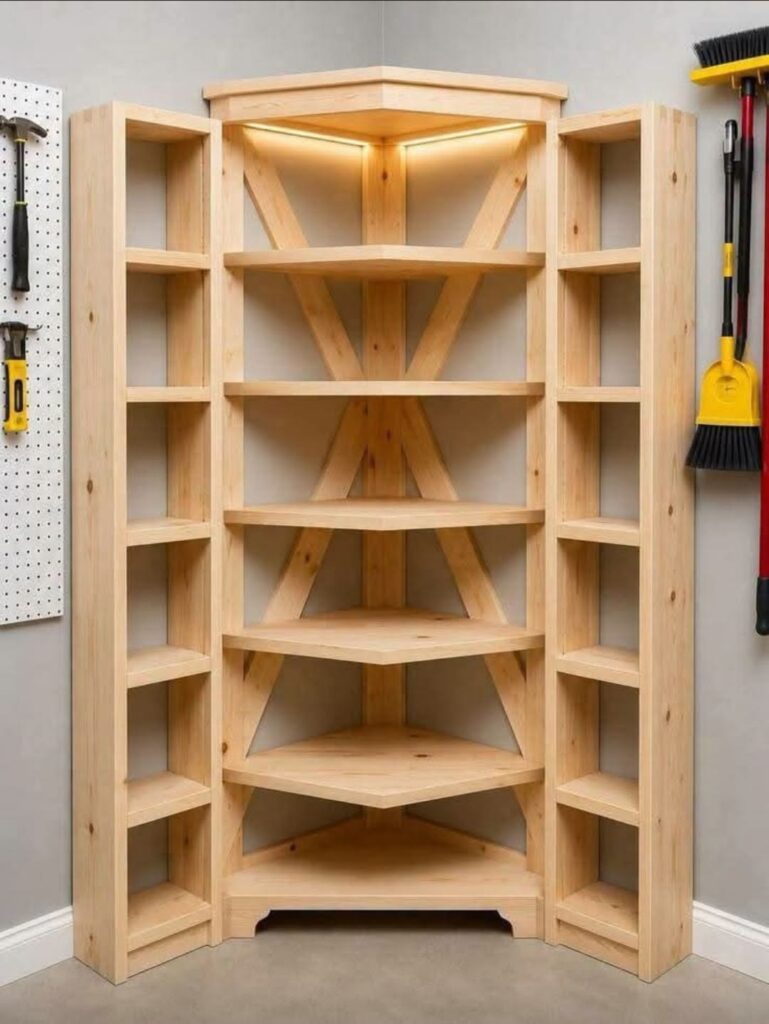
Corners often go completely unused in workshops, which is a shame because they’re perfect for angled storage racks. Build a triangular frame that fits snugly into a corner, then add horizontal slats or vertical dividers depending on your scrap sizes. This setup reclaims wasted space without eating into your main work area.
Use 2x4s for the frame and plywood for shelving, angled at 45 degrees to fit the corner perfectly. A natural wood stain works well here since corner racks often become a visual feature rather than something hidden away.
This works in nearly every workshop style since corners exist everywhere. Now, let’s stack things up.
12. Stackable Crate System

Wooden crates stacked like building blocks create a modular, expandable storage system that grows as your scrap pile grows. Each crate holds a specific category of wood, and you simply add more crates when you need additional capacity. This flexibility is the biggest advantage here.
Build crates from 1×6 boards with open tops for easy access, sized around 18x18x12 inches for manageable weight. Stain them uniformly for a cohesive look, or mix stains for a patchwork farmhouse aesthetic. Stack no more than four crates high to avoid tipping.
This system suits farmhouse and rustic-style workshops especially well. Let’s move to something door-mounted.
13. Door-Mounted Rack

An unused door, whether it’s a shop door or a spare closet door, can become a slim storage rack for thin scraps and dowels. Attach small brackets or pockets across the door’s surface, then hang it on hinges or simply lean it against a wall. This method uses vertical space that would otherwise sit empty.
Use fabric pockets or small wooden bins screwed directly into the door for storage. Paint the door a fun accent color if it’s visible, or leave it plain if it’s tucked in a utility area. This works especially well for pegboard-style doors with hooks added.
This idea suits small workshops or shared garage spaces where floor space is precious. Now for something heavier duty.
14. Barrel or Drum Storage
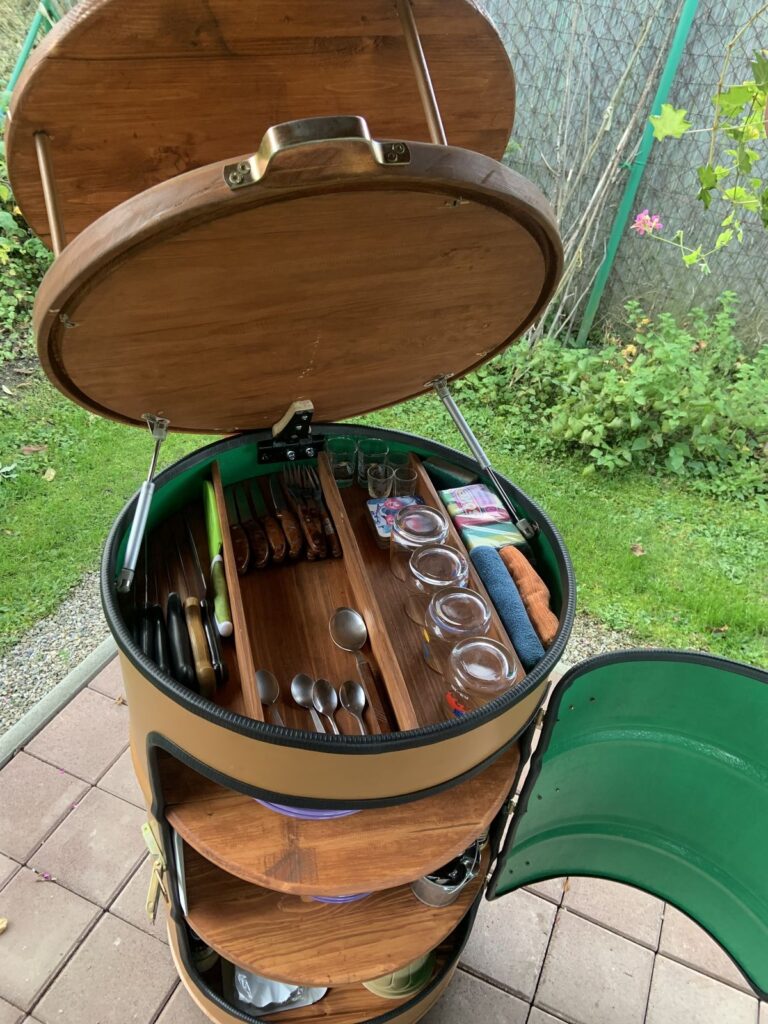
Old barrels or drums, cut down or used whole, make surprisingly effective storage for long dowels, thin strips, and rod-like scraps. Stand the barrel upright, and pieces drop in vertically, sorted loosely by length. This method is fast to set up and requires almost no building skill.
Source a plastic or metal drum from a hardware store or recycling center, and add a coat of paint if you want it to look less industrial. This works particularly well in garages with an industrial or reclaimed aesthetic already established.
Let’s now get more precise with sorting by length.
15. Length-Sorted Lumber Rack

Sorting scraps by exact length rather than general size category saves serious time on bigger projects. Build a rack with multiple tiers, each tier labeled with a length range like “under 12 inches” or “12 to 24 inches.” This method eliminates the guesswork of digging through mixed piles.
Use 2×4 lumber for the frame and add labeled dividers using painted wood or laminated paper tags. This works best in workshops where precision matters, like furniture building or trim carpentry.
This suits modern, organized workshop styles that value efficiency. Next, let’s handle sheet goods specifically.
16. Plywood Sheet Vertical Storage
Plywood sheets and other large panel scraps need their own vertical storage solution since they don’t fit typical racks. Build a narrow vertical slot system using 2×4 dividers spaced a few inches apart, mounted against a wall. Sheets slide in vertically, keeping them flat and preventing warping.
Space dividers based on your typical scrap widths, usually 4 to 6 inches apart. Leave the wood unfinished since this rack usually sits in a utility area rather than a showcase spot.
This works in any workshop that regularly cuts down plywood or MDF sheets. Now, let’s talk logs.
17. Firewood-Style Log Rack for Offcuts

Borrowing from firewood storage design, this rack stacks chunky scraps and thicker offcuts horizontally between two vertical end supports. It’s simple, sturdy, and holds a surprising amount of weight without complicated joinery. This method works especially well for irregular chunks that don’t fit neat categories.
Build the end supports from thick 4×4 posts, then stack scraps horizontally between them just like firewood. This rustic look fits farmhouse or cabin-style workshops perfectly.
Let’s roll into another cart-based idea.
18. Rolling Ladder Cart

An old wooden ladder laid on its side and mounted on a rolling base creates a unique, quirky storage rack for long thin scraps. Each rung becomes a slot where wood rests horizontally, and the whole thing rolls wherever you need it. This method repurposes something you might otherwise throw away.
Add locking casters to the base and sand down any rough or splintered rungs before use. This fits eclectic or vintage-style workshops that enjoy a bit of character in their tools and storage.
Now let’s build something modular.
19. Modular Cubby Wall

A modular cubby wall uses interlocking wooden boxes that can be rearranged or expanded depending on your storage needs. Unlike a fixed cubby system, these individual boxes attach and detach easily, letting you customize the layout as your scrap collection changes.
Build each box from 1/2-inch plywood, sized around 12 inches square, with a simple cleat system on the back for wall mounting. This suits modern workshops that like flexibility and clean, adjustable design.
Let’s shrink down to the smallest scraps now.
20. Small Offcuts Drawer Organizer
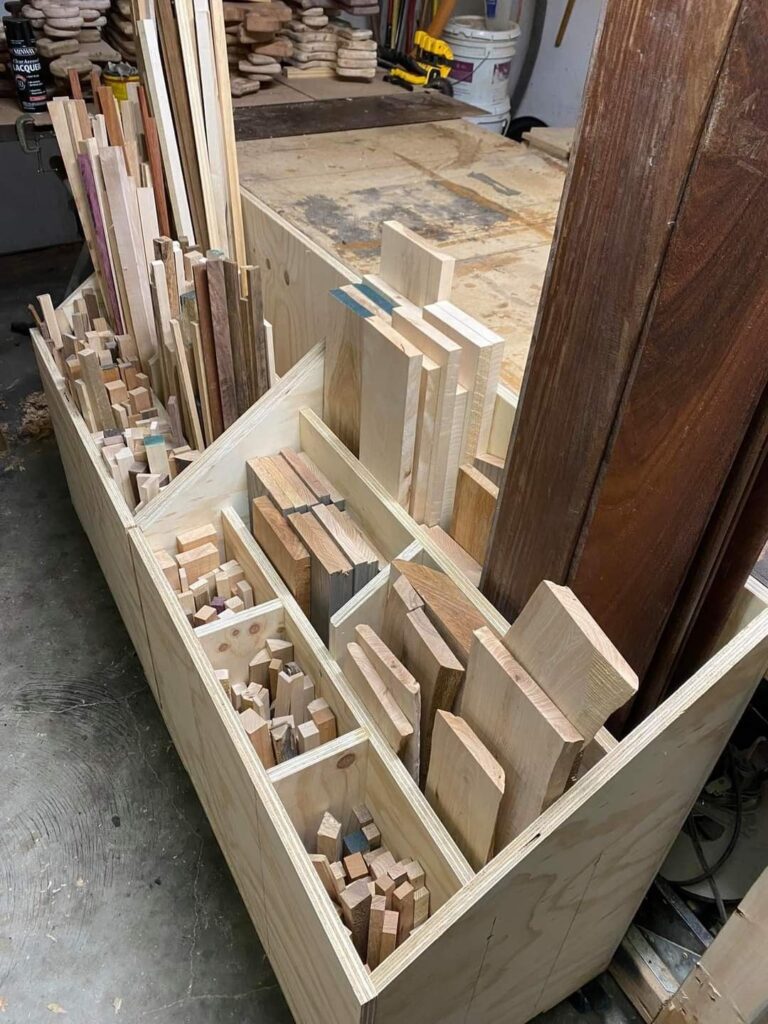
Tiny offcuts, the kind under 6 inches, need their own dedicated organizer or they’ll get lost in bigger storage systems. A small drawer unit with multiple compartments, similar to a hardware organizer, keeps these little pieces sorted and visible. This method prevents tiny useful scraps from ending up in the trash.
Repurpose an old hardware organizer or build small drawers from thin plywood. This works in any workshop style since it’s a small, functional addition rather than a major visual feature.
Finally, let’s step outside.
21. Outdoor Covered Storage Shed or Rack
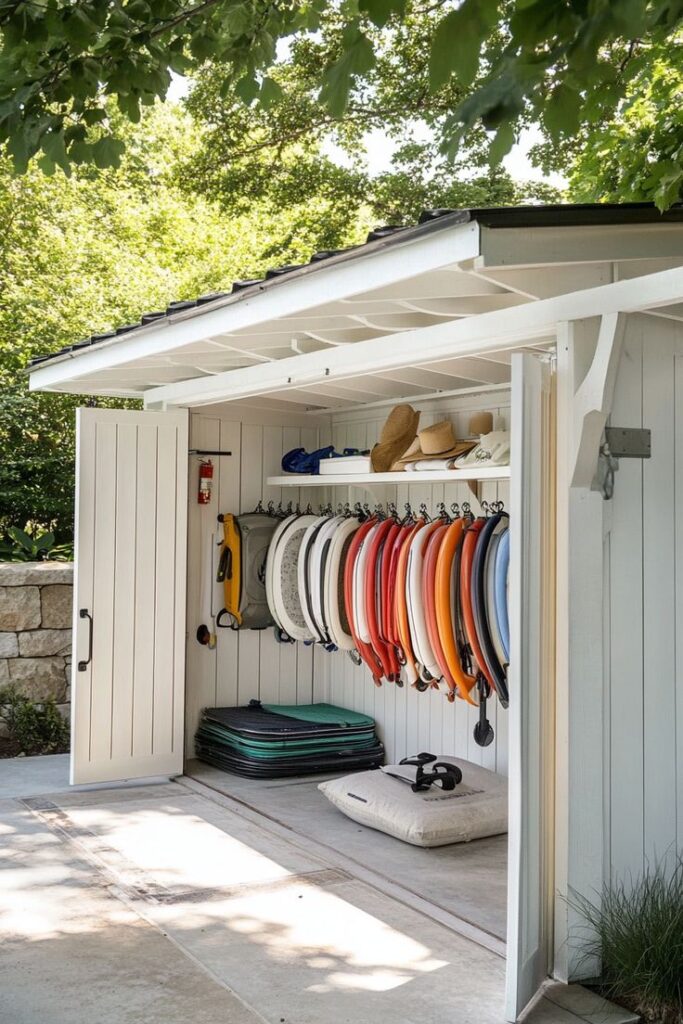
If your shop space is limited, an outdoor covered rack or small shed extends your storage without eating into indoor square footage. Build a simple lean-to structure with a slanted roof to keep rain off, then add racks or shelving inside for scrap storage. This method works well for larger quantities of wood that don’t need daily access.
Use pressure-treated lumber for any structure exposed to weather, and add a waterproof roof panel like corrugated metal or asphalt shingles. This suits homeowners with detached garages or limited indoor shop space.
Comparing Popular Scrap Wood Storage Methods
| Storage Idea | Best For | Approx. Build Cost | Mobility | Skill Level |
|---|---|---|---|---|
| Vertical Wall Rack | Long boards | $20–$40 | Fixed | Beginner |
| Rolling Wood Cart | Mixed scraps | $40–$80 | High | Intermediate |
| PVC Pipe Sorter | Thin strips/dowels | $15–$30 | Fixed | Beginner |
| Pallet Wood Rack | Larger offcuts | $0–$20 | Fixed | Beginner |
| Overhead Ceiling Rack | Long boards | $30–$60 | Fixed | Intermediate |
| Cubby Hole System | Sorted categories | $50–$100 | Fixed | Intermediate |
| Stackable Crates | Expandable storage | $30–$70 | Semi-mobile | Beginner |
| Outdoor Shed/Rack | Bulk storage | $150–$400 | Fixed | Advanced |
Material Choices for Scrap Storage Builds
| Material | Durability | Cost | Best Use Case |
|---|---|---|---|
| 2×4 Lumber | High | Low | Frames, racks, arms |
| Plywood (1/2″ to 3/4″) | Medium-High | Medium | Dividers, drawers, cubbies |
| PVC Pipe | Medium | Low | Dowel and strip storage |
| Pallet Wood | Medium | Very Low | Rustic racks, shelving |
| Metal Brackets | Very High | Low | Wall mounting, support |
Tips for Success
Getting your scrap wood storage right the first time saves you from rebuilding it later. Here’s what’s worked for me:
- Sort wood by size first, species second. It’s faster to grab what you need.
- Leave a little extra room in every rack or bin. Wood piles grow faster than you think.
- Label everything, even if it feels excessive at first. Future you will thank present you.
- Check weight limits before loading up any rack, especially wall-mounted ones.
- Rotate stock occasionally so older scraps don’t just sit forgotten at the bottom.
Common Mistakes and How to Avoid Them
I’ve made most of these mistakes myself, so let me save you the trouble.
Mistake: Overloading wall racks without checking stud placement.
Fix: Always mount into studs or use heavy-duty anchors rated for the weight.
Mistake: Storing wood without sorting by size or type.
Fix: Set up basic categories from day one, even if it’s just “big” and “small.”
Mistake: Ignoring moisture exposure for outdoor storage.
Fix: Use pressure-treated wood and waterproof roofing for any outdoor rack.
Mistake: Building storage too small for future growth.
Fix: Design with at least 25% extra capacity in mind.
Similar Variations Worth Trying
If none of these 21 ideas fit perfectly, here are a few tweaks worth considering:
- Combine a rolling cart base with a cubby system for mobile, sorted storage.
- Add a pegboard backing to any rack for hanging small tools alongside scraps.
- Use old bookshelves as a quick-fix vertical storage solution before building something custom.
- Mix PVC sorters with bucket stands for a hybrid small-scrap organizer.
Wrapping Up Your Scrap Wood Storage Plan
Scrap wood storage doesn’t need to be complicated, but it does need to be intentional. Whether you go with a simple wall rack or build out a full modular cubby wall, the goal stays the same: know what you have, find it fast, and actually use it before it turns into clutter.
I’ve tried nearly every idea on this list at some point in my own shop, and honestly, the best setup is usually a mix of two or three methods working together. Start small, adjust as you go, and your scrap wood storage will keep improving right alongside your woodworking skills.