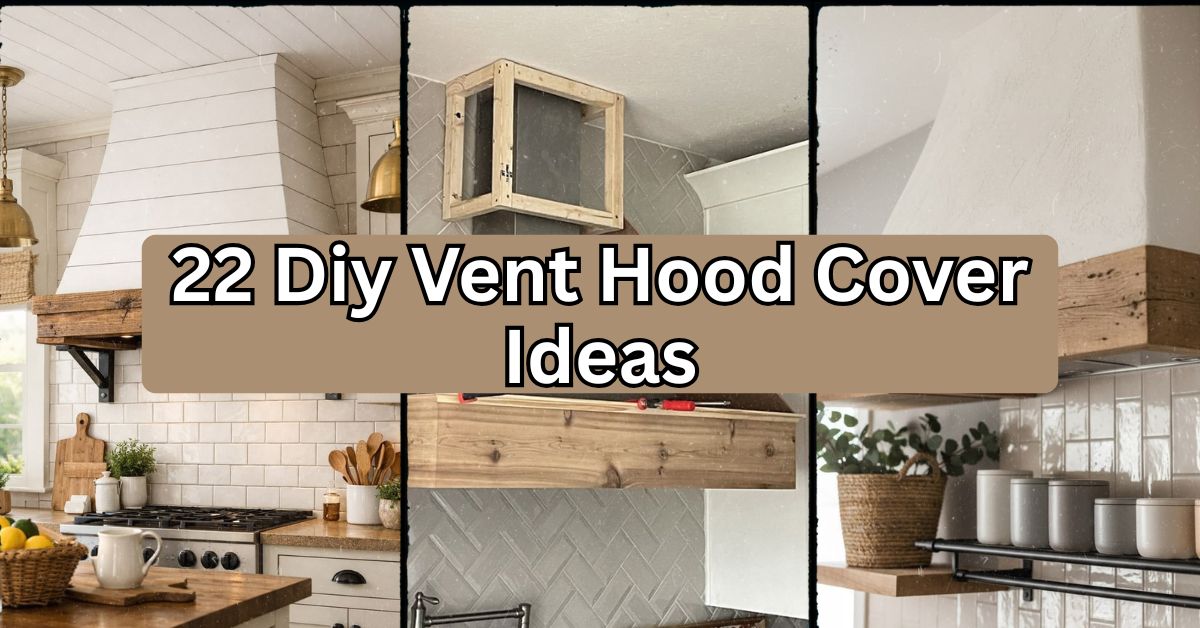
22 DIY Vent Hood Cover Ideas That’ll Transform Your Kitchen (Without Breaking the Bank)
Years have gone by as I’ve been trying to explore kitchen remodel projects, experimenting with different materials, and communicating with professionals who know all the ins and outs of making great vent hood covers. Here, you will find a summary of everything I’ve learned from my research experience—pros, cons, and tips I wish I’d heard earlier.
What are the best DIY vent hood covers? The most popular solutions are vent hood covers made of wood planks, plastering, copper, shiplap, and stucco-like covers. With these techniques, one can turn a boring metal vent into an interesting detail matching kitchen interior décor for just $50-$300, depending on material chosen.
But there’s more to come! You’ll learn how to make DIY vent hood covers, which materials you will need for this task, and what things you should avoid.
Why Your Vent Hood Deserves a Makeover
Let’s be honest. That stock metal vent hood above your stove? It’s boring. It’s the exact same one your neighbor has, and probably three other houses on your street too. A vent hood cover isn’t just decoration—it’s one of the few kitchen upgrades that instantly changes the whole room’s personality. I’ve seen kitchens go from “builder-grade” to “magazine-worthy” with nothing more than some wood, screws, and a weekend of elbow grease.
The best part? You don’t need to be a carpenter. Most of these projects use basic tools and materials you can grab from any hardware store.
1. Classic Wood Plank Cover

Wood plank covering is undoubtedly the most common option, and not without reason—being beginner-friendly and gorgeous in any kitchen interior. The principle of this option is rather simple: all you need to do is create a frame around the old hood with the help of cedar, pine, and other kinds of wood planks that will be placed either vertically or horizontally.
For rustic farmhouses, choose knotty pine, while smooth poplar is perfect for contemporary kitchens. Walnut and espresso are stain colors that would look great in traditional kitchens, while whitewashed and natural finish would fit better coastal and farmhouse kitchens.
For the construction, always measure twice and cut once, and remember to leave some space (0.25 inches) between each plank for the natural expansion of wood. This option suits farmhouses, cottages, and transitional kitchens.
Feeling the need for some texture? Then let’s discuss the plaster option.
2. Venetian Plaster Finish

Plaster covers create that expensive, old-world charm you see in high-end European kitchens. This technique involves applying joint compound or specialized plaster over a wooden frame, then sanding and shaping it to create soft, curved edges.
The magic happens in the texture—use a trowel to create subtle waves or keep it smooth for a more contemporary look. Cream, warm white, or soft gray tones work best since they mimic natural stone. Add a wax finish for extra depth and sheen.
Practical tip: work in thin layers rather than one thick coat, it dries more evenly and cracks less. This style fits Mediterranean, Old World, and modern farmhouse kitchens perfectly.
Speaking of texture, copper brings an entirely different vibe.
3. Copper Cladding

Copper vent hoods scream luxury without the luxury price tag when you DIY it. This involves wrapping thin copper sheets around a wooden frame, securing them with small nails or adhesive, then allowing natural patina to develop over time.
Copper pairs gorgeously with black hardware, dark wood cabinets, and warm brass fixtures. For a faster aged look, use a patina solution instead of waiting years for natural oxidation.
Wear gloves when handling copper sheets, the edges can be sharp. This dramatic option suits industrial, eclectic, and Mediterranean kitchen styles.
Now, if metal isn’t your thing, shiplap might be exactly what you need.
4. Shiplap Statement Piece

Shiplap covers have that farmhouse charm everyone loves, thanks to their clean horizontal lines and subtle shadow gaps. You’ll build a box frame, then attach shiplap boards horizontally, creating those signature reveal lines between each board.
White paint remains the go-to color, but don’t discount sage green or navy blue for a bolder statement. Pair with black hardware and open shelving for that complete farmhouse aesthetic.
Pre-primed shiplap saves serious time during installation. This design fits farmhouse, coastal, and transitional kitchens especially well.
Want something with more dimension? Try adding molding details next.
5. Decorative Molding Frame

Molding frames add architectural interest without requiring advanced skills. This method involves attaching crown molding, picture frame molding, or corbels around a basic wood box structure to create depth and visual detail.
Match your existing cabinet trim for cohesion, or contrast with a different profile for visual interest. White and cream colors highlight the molding’s shadows and details beautifully.
Use a miter saw for clean corner joints, it makes a massive difference in the finished look. This elegant option works wonderfully in traditional, French country, and transitional kitchens.
Ready to go bold? Stucco textures are next.
6. Stucco-Style Hood

Stucco covers bring that sun-baked, Mediterranean warmth into your kitchen. This technique uses textured joint compound applied in swirling patterns over a curved wooden frame, mimicking the look of real stucco exteriors.
Warm terracotta, sandy beige, or soft white colors complete the Mediterranean feel. Pair with wrought iron fixtures and warm wood tones for authenticity.
Practice your swirl technique on a scrap piece first—consistency matters here. This style transforms Spanish, Tuscan, and Southwestern-inspired kitchens.
Let’s shift gears to something sleeker now.
7. Sleek Stainless Steel Panel

Stainless steel covers maintain that professional kitchen aesthetic while hiding unsightly duct work. This involves attaching brushed stainless steel panels to a simple frame, creating clean, commercial-grade lines.
This modern choice pairs naturally with other stainless appliances, black accents, and minimalist cabinetry. Keep everything else simple—this material speaks for itself.
Use adhesive-backed panels for easier installation without visible screws. This industrial-modern option suits contemporary, industrial, and minimalist kitchens.
Feeling crafty? Board and batten offers great texture too.
8. Board and Batten Design
Board and batten covers add vertical interest through alternating wide boards and narrow battens. This classic technique creates dimension through simple carpentry, giving your hood a custom, tailored appearance.
White or soft gray colors let the architectural lines shine. This design pairs beautifully with brass or matte black hardware for contrast.
Space your battens evenly using a spacer block for consistency throughout the project. This versatile style fits farmhouse, coastal, and traditional kitchen designs.
Now let’s explore something with more curves.
9. Curved Plaster Hood

Curved hoods soften the kitchen’s overall look, especially when surrounded by sharp cabinet lines. This advanced technique involves building a curved wooden substrate first, then applying plaster or joint compound to smooth the transitions.
Soft whites, warm creams, and gentle grays complement the organic shape perfectly. This style often becomes the kitchen’s focal point, so keep surrounding elements simpler.
Building the curved frame requires patience—use flexible plywood (called bendy board) for easier shaping. This romantic option suits French country, Mediterranean, and organic modern kitchens.
Brick lovers, this next one’s for you.
10. Faux Brick Accent

Faux brick vent covers bring rustic charm using lightweight brick veneer panels instead of heavy real brick. This method attaches thin brick veneer to a wooden frame using construction adhesive, creating an authentic textured appearance without excessive weight.
Red brick offers traditional warmth, while whitewashed or gray brick creates a more updated farmhouse feel. Pair with wood beams and vintage lighting fixtures.
Seal the brick veneer with a matte sealer to prevent grease absorption over time. This charming style fits rustic, industrial, and farmhouse kitchen aesthetics.
Let’s talk about combining materials next.
11. Wood and Metal Combo

Mixing wood and metal creates dynamic visual contrast that many single-material covers lack. This design layers a wood frame with metal strapping or corner brackets, combining warmth with industrial edge.
Natural wood tones paired with black or aged bronze metal accents create striking contrast. This combination works particularly well when your kitchen already mixes materials elsewhere.
Pre-drill holes before attaching metal strapping to prevent wood splitting. This eclectic style suits industrial farmhouse, rustic modern, and transitional kitchens.
Ready for something with real historical charm?
12. Reclaimed Barn Wood

Reclaimed barn wood covers bring genuine history and character that new lumber simply can’t replicate. This project uses authentic aged barn wood, preserving natural weathering, nail holes, and color variations for maximum character.
The wood’s natural gray, brown, and weathered tones need no additional staining—authenticity is the entire point here. Pair with wrought iron or aged brass hardware.
Always check reclaimed wood for structural integrity and treat for pests before installation. This authentic style perfectly complements farmhouse, rustic, and cottage-style kitchens.
Now, let’s explore a smoother, more contemporary option.
13. Smooth Painted MDF

Painted MDF covers offer the smoothest, most seamless finish for modern kitchens. This budget-friendly approach uses medium-density fiberboard, which sands to a perfectly smooth surface unlike natural wood grain.
Bold colors work exceptionally well here since MDF takes paint evenly. Consider navy, forest green, or classic black for dramatic impact against white cabinetry.
Seal MDF edges properly before painting to prevent moisture damage over time. This clean-lined style suits modern, contemporary, and minimalist kitchen designs.
Let’s add some geometric flair next.
14. Geometric Panel Design

Geometric panels create visual interest through repeated shapes and patterns, adding contemporary artistic flair. This technique attaches small wood pieces in triangular, hexagonal, or diamond patterns across the hood’s front surface.
Monochromatic color schemes highlight the pattern’s shadows and depth beautifully. This design becomes a genuine art piece within your kitchen space.
Create a template first to ensure consistent spacing and angles throughout the pattern. This artistic style fits modern, eclectic, and contemporary kitchen aesthetics.
Craving something with vintage appeal? Let’s discuss tin tile next.
15. Pressed Tin Tile Cover

Pressed tin tiles bring Victorian-era charm and incredible texture to vent hood covers. This method attaches decorative tin ceiling tiles to a wooden frame, creating intricate patterns through light and shadow.
Antique bronze, silver, or painted white finishes all work depending on your desired look. This design pairs naturally with vintage lighting and traditional cabinetry.
Cut tin tiles carefully with tin snips, and always wear protective gloves during installation. This ornate style suits Victorian, traditional, and eclectic vintage kitchens.
Now for something with clean, architectural lines.
16. Vertical Slat Design

Vertical slat covers create height illusion while adding subtle texture through repeated linear elements. This design attaches evenly spaced wood slats vertically across a simple frame, similar to modern accent walls.
Natural wood tones or matte black finishes both work beautifully here. This style pairs exceptionally well with minimalist, Scandinavian-inspired kitchen designs.
Use a consistent spacing template between slats for professional-looking results. This modern style fits Scandinavian, minimalist, and contemporary kitchens perfectly.
Let’s explore something with more ornate detail now.
17. French Country Corbel Style

French country covers use decorative corbels and curved edges to create that romantic, old-world European feel. This elaborate design combines curved wooden framing with ornamental corbels underneath for support and visual interest.
Cream, soft blue, or warm white colors complement this romantic style beautifully. Pair with vintage-inspired hardware and warm lighting fixtures.
Purchase pre-made corbels rather than carving your own—it saves considerable time and effort. This romantic style perfectly suits French country and traditional kitchen designs.
Ready for an industrial approach? Let’s discuss raw metal next.
18. Raw Steel Industrial Look

Raw steel covers embrace an unfinished, authentic industrial aesthetic that’s become increasingly popular. This technique uses cold-rolled steel sheets with minimal treatment, allowing natural patina and slight imperfections to show.
Pair with exposed brick, concrete counters, and black metal fixtures for cohesive industrial styling. The raw material itself provides all the visual interest needed.
Apply a clear protective coating to prevent excessive rusting while maintaining that raw appearance. This edgy style fits industrial, urban loft, and modern farmhouse kitchens.
Now let’s soften things with a beadboard option.
19. Beadboard Cottage Style
Beadboard covers bring charming cottage character through those classic vertical grooves. This traditional technique attaches beadboard paneling to a simple frame, creating texture through repeated narrow lines.
White or soft pastel colors enhance beadboard’s cottage charm perfectly. This design pairs naturally with vintage hardware and gingham or floral kitchen accents.
Pre-primed beadboard panels significantly reduce your painting time and effort. This charming style suits cottage, coastal, and traditional farmhouse kitchens.
Let’s explore a bold, dark option next.
20. Matte Black Statement Hood

Matte black covers create dramatic contrast and serve as an undeniable focal point in any kitchen. This design simply paints your wooden frame cover in matte black, letting the color itself provide all necessary drama.
This bold choice pairs beautifully with brass hardware, white cabinetry, and natural wood accents. The contrast creates sophisticated visual balance throughout the space.
Use chalk paint for that perfect matte finish without excessive sheen. This dramatic style fits modern, contemporary, and transitional kitchen designs.
Now let’s discuss a textured lime wash finish.
21. Lime Wash Texture

Lime wash covers create that chalky, aged European plaster look using breathable mineral-based paint. This technique applies lime wash in layers over a plaster or wood base, creating subtle color variation and texture.
Soft whites, warm terracotta, and muted sage colors work exceptionally well with lime wash. This finish naturally develops slight variations, adding authentic character.
Apply lime wash with a natural bristle brush using cross-hatching motions for authentic texture. This organic style suits Mediterranean, Old World, and modern farmhouse kitchens.
Finally, let’s discuss combining multiple techniques.
22. Mixed Material Statement Piece
Mixed material covers combine two or more techniques—like wood and plaster, or metal and shiplap—creating truly custom, one-of-a-kind results. This advanced approach requires planning but delivers unmatched personality and visual interest.
Choose complementary rather than competing textures and colors for cohesive results. This design works best when you have a clear vision or inspiration photo beforehand.
Sketch your design first, planning where each material transition occurs before beginning construction. This personalized style can suit virtually any kitchen aesthetic when planned thoughtfully.
Material Comparison Table
| Material | Difficulty Level | Average Cost | Best Kitchen Style | Durability |
|---|---|---|---|---|
| Wood Plank | Beginner | $50-$150 | Farmhouse, Cottage | High |
| Venetian Plaster | Advanced | $80-$200 | Mediterranean, Old World | Medium |
| Copper Cladding | Intermediate | $150-$300 | Industrial, Eclectic | High |
| Shiplap | Beginner | $60-$120 | Farmhouse, Coastal | High |
| Stainless Steel | Intermediate | $100-$250 | Modern, Industrial | Very High |
| Faux Brick | Intermediate | $70-$180 | Rustic, Industrial | High |
| MDF Painted | Beginner | $40-$100 | Modern, Minimalist | Medium |
| Reclaimed Wood | Advanced | $80-$220 | Farmhouse, Rustic | Very High |
Tips for Success
Getting your vent hood cover right the first time saves headaches later. Here’s what actually matters:
- Measure your existing hood precisely before buying any materials—vent hoods vary significantly in size and shape
- Check local building codes regarding clearance requirements around heat sources
- Choose fire-resistant materials near the actual heat source, even if decorative elements sit further away
- Test paint and stain colors on scrap pieces before committing to your final surface
- Leave ventilation gaps as required by your hood’s manufacturer specifications
- Work with a helper when lifting larger frame pieces into position
Common Mistakes and How to Avoid Them
I’ve seen plenty of DIY vent hood projects go sideways. Here’s what trips people up most often:
Mistake: Ignoring weight limits
Solution: Always verify your existing hood and mounting brackets can support the additional cover weight, especially with heavier materials like stone veneer or thick metal.
Mistake: Skipping the ventilation clearance
Solution: Maintain manufacturer-recommended clearance between your cover and the actual exhaust fan or duct work to prevent overheating.
Mistake: Using non-heat-resistant materials near the stovetop
Solution: Choose materials rated for kitchen heat exposure, particularly for the lower portion closest to your cooking surface.
Mistake: Rushing the measuring process
Solution: Measure three times, cut once. Seriously—this single habit prevents most costly mistakes.
Mistake: Forgetting about grease buildup
Solution: Select finishes that wipe clean easily, avoiding overly porous materials in high-splatter zones.
Similar Variations Worth Exploring
Once you’ve mastered basic vent hood covers, consider these creative twists:
- Two-tone designs combining light and dark wood tones
- Seasonal removable panels for holiday decorating
- LED strip lighting integrated into the cover’s underside
- Chalkboard paint sections for grocery lists or recipes
- Magnetic panels allowing quick style changes
- Textured wallpaper application over smooth MDF bases
Wrapping It Up
Building your own vent hood cover doesn’t require professional skills or a massive budget. Whether you choose simple wood planks or attempt an ambitious plaster finish, these DIY vent hood cover ideas prove that small kitchen changes create big visual impact.
Start with whichever design speaks to your kitchen’s existing style, gather your materials, and don’t be afraid to make it uniquely yours. That plain metal hood won’t stand a chance against your new creative vision.