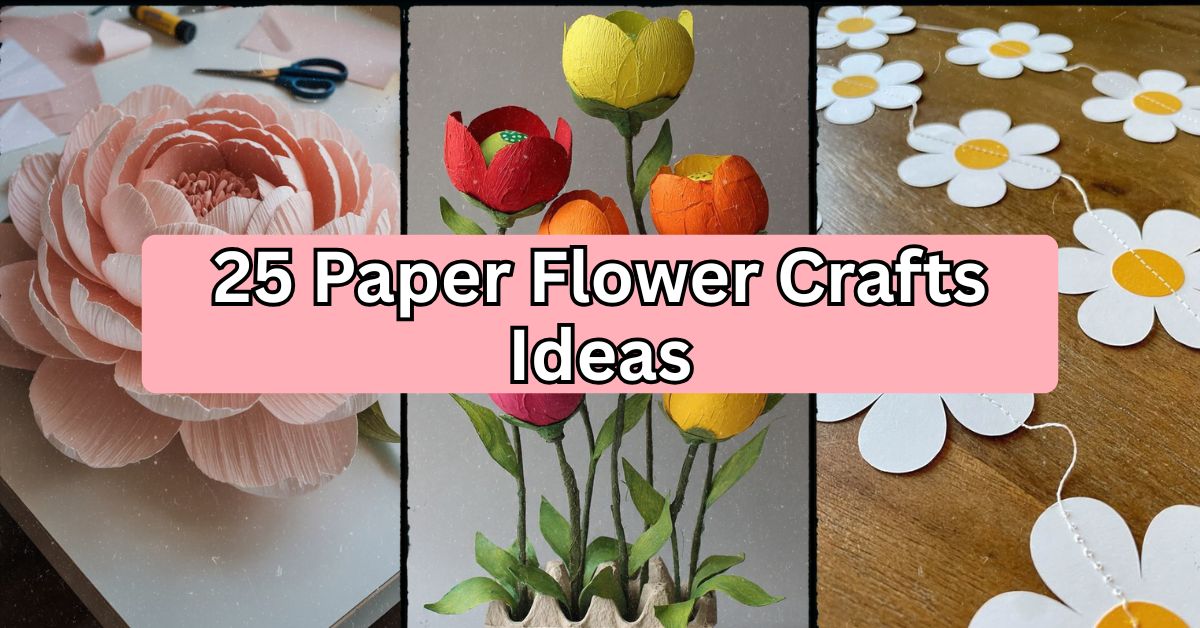
25 Paper Flower Crafts Ideas That’ll Transform Your Home Decor
As an individual who has tested countless craft ideas over many years, paper flower crafts definitely rank amongst the favorites and that is not just because I think they are cool to make. They can be made extremely cheaply and they can be preserved forever without fading or wilting like actual flowers do. Not only that, you get to play around with colors to create perfect matches!
So which paper flower crafts should you try out this week? Some popular paper flower crafts to explore include paper roses, paper peonies, sunflowers using coffee filters, large scale wall decor floral designs, origami lilies, and even paper flower garlands/wreaths.
I’m going to tell you all about how to execute twenty-five separate paper flower crafts below!
Why Paper Flower Crafts Deserve a Spot in Your Home
And here’s why making paper flower crafts is actually practical: fresh flowers wilt; they require ongoing expense weekly; certain individuals are allergic to them. The craft eliminates these issues. Make one set of flowers and use them for many years without any fuss. With handmade pieces, you have full creative control over each aspect, such as petal forms, hues, sizes, scents when using a few drops of essential oils. Regardless of whether your goal is to decorate baby nurseries, add decoration to wedding reception tables, or simply liven up a blank wall space, there are plenty of options available. Below, I’ll describe 25 different ideas, divided by difficulty and intended rooms.
1. Classic Tissue Paper Roses
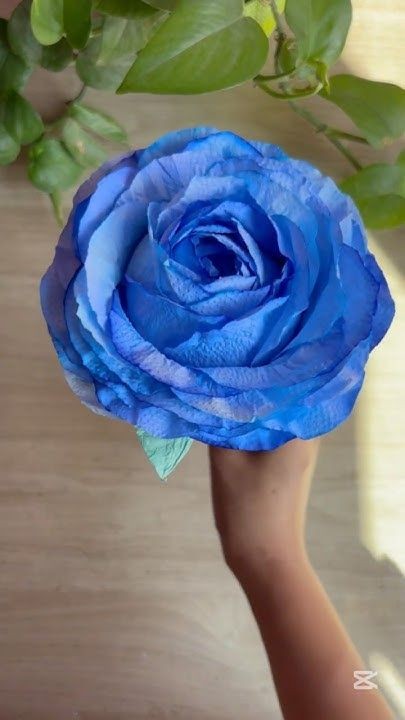
Making tissue paper flowers is the perfect place to start when you are learning how to craft. Believe me; these guys will never get old. Layer different colors of tissue paper together, twist them where you started and then arrange all of those petals in a ruffle. Classic color schemes include pastel shades of pink, cream or white, while modern color palettes include orange and turquoise. Here’s an insider tip: spray your completed flower with hairspray. It helps keep the shape!
This type of project is best suited to farmhouse decor or shabby chic decorating styles. Mason jars make for the ideal centerpiece or arrangement holder. The next flower on my list is the crepe paper peony.
2. Crepe Paper Peonies
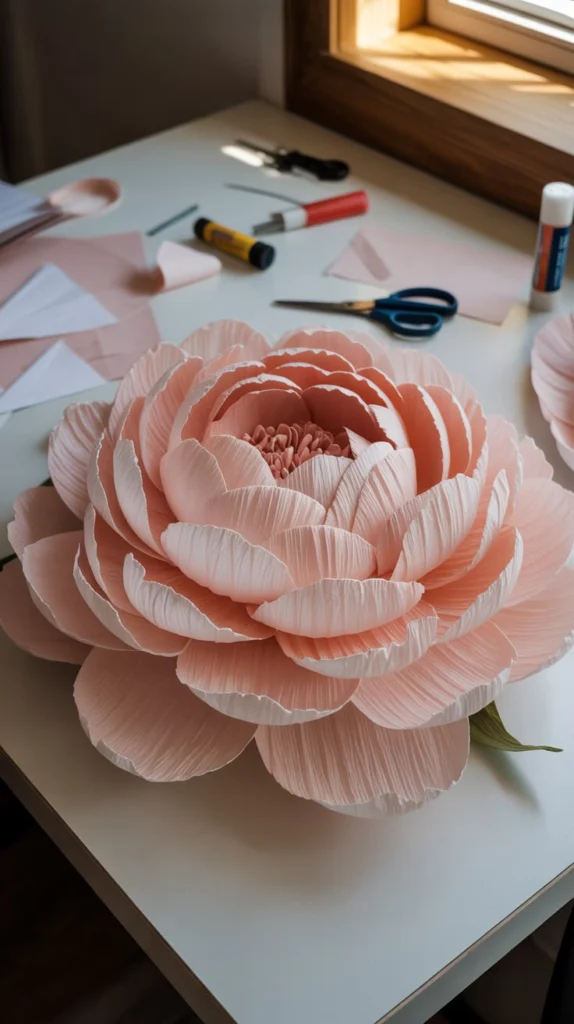
The crepe paper peonies give all the impact without breaking your budget compared to actual peonies that tend to be very expensive outside the blooming season. Crepe paper has elastic properties that will allow you to create lifelike petals with ruffles. You can opt for blush pink, corals, and lavenders if you want a soft floral feel.
They require time to craft because there are up to 15 to 20 layers per single bloom. But it’s worth every effort. Each petal should be wired separately so that you’ll still be able to manipulate its form post construction.
Pro Tip: Create an antique appearance using a coffee stain effect on your white crepe papers.
Perfect for both modern farmhouse style as well as traditional home decor. Let’s switch to something different now.
3. Coffee Filter Sunflowers
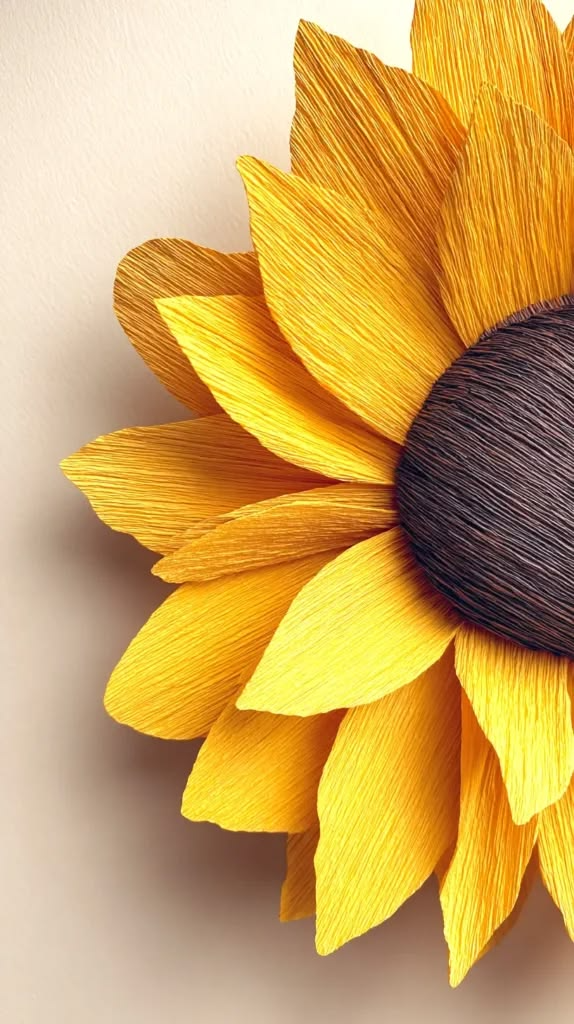
Coffee filters make surprisingly convincing sunflower petals once you dye the edges with yellow or orange ink. This project costs almost nothing since coffee filters run cheap in bulk. Layer the dyed filters around a brown button or pom-pom center to nail that classic sunflower look.
Kids love helping with this one because the dyeing process feels like a science experiment. Pair these blooms with burlap ribbon for a countryside farmhouse aesthetic.
Tip: Use washable markers instead of dye for a mess-free version that still gives vibrant color.
Sunflowers fit rustic kitchens and country-style porches perfectly. From here, we jump into statement-making wall art.
4. Giant Paper Flower Wall Art
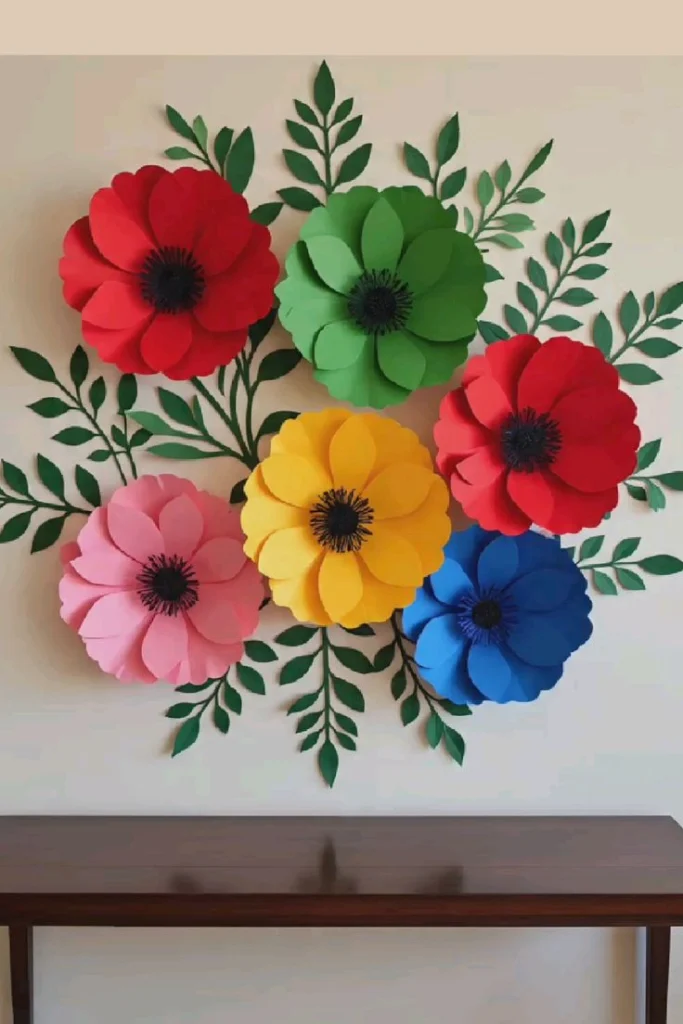
Giant paper flowers turn a blank wall into a photo-worthy backdrop instantly. Cardstock or poster board works best here since it holds shape at larger sizes. Pick a color palette that matches your existing decor—jewel tones for a bold statement, pastels for nurseries, or monochrome white for minimalist spaces.
Cut petals in varying sizes, curl the edges with a pencil or dowel, then layer and glue them onto a circular base. Mount with strong adhesive strips or small nails.
Tip: Create a cluster of three different-sized flowers instead of one giant bloom for a more dynamic display.
This idea suits modern, bohemian, and glam interiors. Next, let’s fold our way into origami territory.
5. Origami Lily Blooms
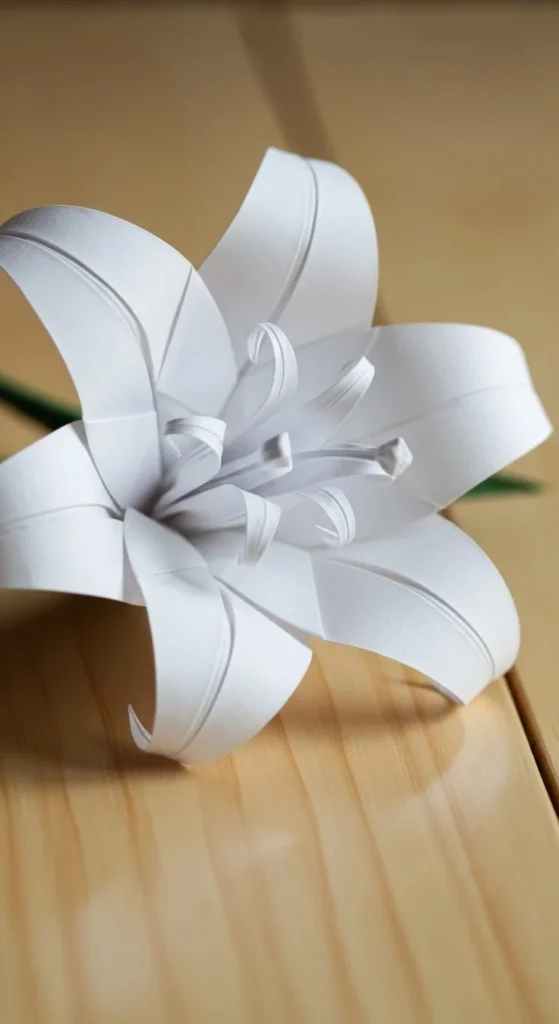
Origami lilies require zero glue, which appeals to crafters who want a cleaner, more geometric aesthetic. You fold square paper through a series of precise creases to create the pointed, elegant petals lilies are known for. White or pale yellow paper mimics real lilies closely.
This project demands more patience than others on this list, but once you learn the fold pattern, you can churn out a dozen in an hour. Display them in a shallow bowl or scatter them across a table runner.
Tip: Use double-sided colored paper so the inside and outside of each petal show a subtle color contrast.
Origami lilies fit sleek, modern Japanese-inspired spaces. Let’s move to a project perfect for garlands next.
6. Cardstock Daisy Garlands

Daisies are simple shapes, which makes them ideal for garland projects where you need to make dozens of the same flower. Cardstock holds up well when strung together and hung across windows or mantels. White petals with yellow centers give that cheerful, classic daisy look.
String them on twine or fishing line, spacing each flower about four inches apart. This garland works great for spring decor or kids’ birthday parties.
Tip: Punch a small hole in the center of each daisy before assembly so your string threads through cleanly without tearing the paper.
Daisy garlands suit playful, cottagecore, and coastal-style homes. Now, let’s look at a punch-based technique that speeds things up.
7. Paper Punch Flower Cards

If patience isn’t your strong suit, paper punches are a lifesaver. These handheld tools stamp out perfect flower shapes in seconds, which you can layer for dimension on greeting cards or scrapbook pages. Mix punch sizes—small, medium, large—and stack them with a brad or button center.
This technique works especially well for handmade cards, gift tags, and scrapbooking projects rather than large-scale decor.
Tip: Buy punches in three complementary sizes so you always have options for layering without extra purchases.
This project fits any home style since it’s mostly used for paper goods rather than room decor. Next, we explore a more painterly approach.
8. Watercolor Paper Poppies

Watercolor paper poppies bring an artsy, hand-painted quality to your paper flower collection. Before cutting petal shapes, paint sheets of watercolor paper with red, orange, or pink washes, letting the colors bleed naturally. Once dry, cut and shape the petals as usual.
The slight color variation from the watercolor technique makes each poppy look one-of-a-kind, unlike flat single-color paper.
Tip: Add a black paper center to mimic the poppy’s signature dark middle for extra realism.
These poppies suit bohemian and eclectic homes that favor artistic, imperfect textures. Let’s pivot to a budget-friendly upcycled option.
9. Egg Carton Flowers

Egg cartons might seem like trash, but the individual cups make perfect flower bases once painted and trimmed into petal shapes. This is one of the most budget-conscious paper flower crafts on this list since you’re reusing something headed for the recycling bin anyway.
Cut around each cup, snip petal shapes into the edges, then paint with acrylics in whatever shade fits your space. Glue a bead or button in the center for extra flair.
Tip: Bake the painted cartons briefly at low heat to help the paint set faster and reduce smudging.
This eco-friendly project fits rustic and sustainable-themed homes especially well. Next, let’s try something equally frugal with cupcake liners.
10. Cupcake Liner Blossoms
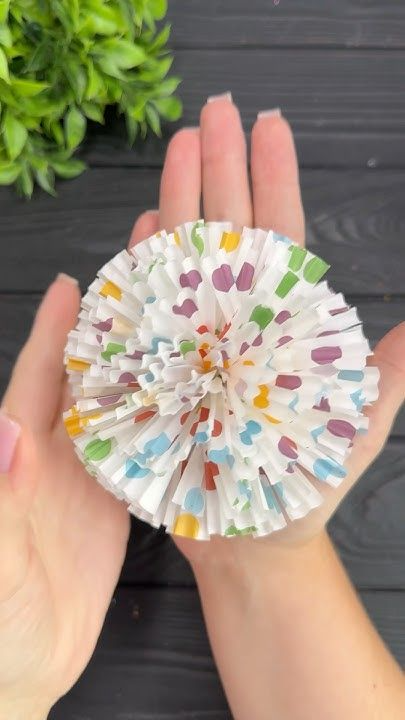
Cupcake liners already come pre-shaped with ruffled edges, so half the work is done before you even start. Flatten them slightly, layer two or three liners of different sizes, and pinch the center to create dimension. Patterned liners add instant texture without extra paint or ink.
This project moves fast, making it great for last-minute party decor or a rainy afternoon activity with kids.
Tip: Use metallic or foil liners for a festive, celebratory look during holidays.
These blossoms suit casual, kid-friendly spaces and party decor rather than formal rooms. Moving on, let’s talk about an unexpected material—paper straws.
11. Paper Straw Flowers

Paper straws, usually saved for drinks, actually make excellent flower stems and even petal shapes when flattened and cut. Snip one end into fringe, then curl each strip outward with scissors or your fingers to form delicate, spiky blooms. Pair with a contrasting straw as the stem for a cohesive look.
This project works particularly well for lightweight table settings since the straws stay upright without extra support.
Tip: Insert a thin wire inside the straw stem for better posability when arranging in a vase.
Paper straw flowers suit modern, minimalist party tablescapes. Now let’s build something with more presence for centerpieces.
12. 3D Paper Flower Centerpieces

For dining tables that need a serious focal point, 3D paper flower centerpieces deliver drama without wilting by dinner’s end. Combine several flower types—roses, peonies, and daisies—at varying heights on a single base, like a foam block or wooden dowel structure.
Stick to a cohesive color story: two or three main shades plus one accent color keeps things from looking chaotic.
Tip: Vary the flower heights by mounting some on longer wire stems so the arrangement doesn’t look flat from the side.
These centerpieces fit formal dining rooms and event spaces alike. Next, let’s talk sustainability with newspaper crafts.
13. Newspaper Upcycled Flowers

Newspaper flowers carry a distinct vintage charm thanks to the visible text and slightly yellowed tone of the paper. This project costs nothing since you likely have old newspapers lying around already. Roll strips into rosette shapes or cut petal layers like you would with cardstock.
For added color, dip the petal edges in diluted acrylic paint or tea to enhance that aged, sepia look.
Tip: Seal finished flowers with a matte spray sealant to prevent smudging from newspaper ink.
Newspaper flowers suit industrial, vintage, and eclectic decor styles. Let’s move toward a wearable version next—wreaths.
14. Paper Flower Wreaths

A paper flower wreath makes a stunning door decoration that never needs watering and never fades from the sun the way silk flowers do over time. Start with a foam or wire wreath base, then hot-glue a mix of flower sizes and types around it, filling gaps with paper leaves or greenery.
Seasonal color swaps make this project versatile—pastels for spring, deep reds and oranges for fall.
Tip: Work in small clusters of three flowers at a time rather than placing them one by one for a fuller, more natural look.
Wreaths suit farmhouse, traditional, and cottage-style front doors. Next, we revisit vintage charm with book pages.
15. Book Page Flowers

Old book pages, especially yellowed ones from used bookstores, create flowers with built-in vintage texture and even visible printed text peeking through the petals. This project appeals to book lovers looking to repurpose damaged copies instead of tossing them out.
Cut petal shapes from the pages, then curl edges with a bone folder or the back of a spoon for subtle dimension.
Tip: Choose pages with interesting illustrations or unique fonts to make certain flowers stand out as focal pieces.
Book page flowers suit literary-themed rooms, home libraries, and vintage decor. Now let’s discuss a project for the big day—weddings.
16. Paper Flower Bouquets for Weddings

Brides increasingly choose paper flower bouquets since they double as lasting keepsakes long after the wedding day ends. Crepe paper works best here for its realistic texture, and you can custom-match every shade to the wedding color palette exactly, something real flowers can’t always guarantee.
Wrap the stems in satin ribbon or lace for a polished, bridal finish.
Tip: Make the bouquet at least a month in advance so you have time to fix any petals that don’t sit quite right.
This project suits any wedding style, from rustic barn weddings to formal ballroom affairs. Next, let’s fold things differently with accordion techniques.
17. Accordion Fold Flowers

Accordion folding creates flowers with a distinct pleated, fan-like texture that looks more geometric than traditional rounded petals. Fold a rectangular strip of paper back and forth accordion-style, then pinch and secure the center, letting the folds fan outward into a flower shape.
This technique works fast, making it ideal for large quantities needed in garlands or backdrop displays.
Tip: Use paper with a subtle pattern on one side so the folds reveal little pops of design as they fan out.
These flowers suit modern and geometric-themed decor. Let’s move into something wearable next.
18. Paper Flower Crowns

Paper flower crowns bring festival vibes to birthday parties, bridal showers, or photo sessions without the wilting problem fresh flower crowns face after an hour in the sun. Build a base from floral wire or a fabric-covered headband, then attach flowers of varying sizes around it.
Mix textures—tissue, crepe, and cardstock blooms together—for visual interest.
Tip: Keep the crown lightweight by using smaller flower sizes near the back and only a few statement blooms near the front.
These crowns suit boho and festival-themed events. Now, let’s return indoors with a layered rose variation.
19. Layered Cardstock Roses

Cardstock roses hold their shape incredibly well thanks to the paper’s sturdiness, making them ideal for pieces that get handled often, like centerpieces or gift toppers. Cut a spiral shape, then roll it inward from the outer edge toward the center, letting it naturally coil into a rose shape.
This technique requires zero glue until the very last step, which speeds up production time significantly.
Tip: Practice on scrap paper first since spiral-cutting takes a few tries to master the even, continuous line.
These roses fit modern, minimalist spaces that favor clean lines. Next, let’s hang things up with mobiles.
20. Paper Flower Mobiles

Paper flower mobiles add gentle movement and color to nurseries, kids’ rooms, or reading nooks. Attach flowers of varying sizes to fishing line at different lengths, then suspend them from a wooden hoop or embroidery ring.
Soft pastel colors work beautifully for nurseries, while brighter primary colors suit playrooms.
Tip: Balance the mobile by testing it before finalizing knots, adjusting flower placement so it hangs evenly.
Mobiles suit nursery and modern kid-friendly spaces. Now let’s shrink things down for cake decor.
21. Fondant-Look Paper Flowers for Cake Toppers

These delicate paper flowers mimic the smooth, sculpted look of fondant cake decorations, giving you a reusable, food-safe-adjacent alternative for cake displays (just avoid direct food contact). Thin cardstock or vellum paper shaped into small rose or blossom forms works best at this miniature scale.
Pastel shades in pink, white, and gold mimic classic wedding cake aesthetics closely.
Tip: Attach a toothpick or floral wire stem before assembly so the flower can be inserted directly into cake frosting or foam displays.
These toppers suit celebration decor for any home style. Let’s move to garlands for parties next.
22. Paper Flower Garlands for Parties

Garlands strung with an assortment of flower shapes and sizes instantly transform a plain wall into party-ready decor. Mix tissue, cardstock, and crepe flowers along a single garland for textural variety, spacing them evenly along string or ribbon.
Color-block by section for a bold, graphic effect, or blend gradually for an ombré look.
Tip: Attach flowers with small loops of tape or glue dots so you can easily remove and reuse them for future events.
These garlands suit birthday parties, baby showers, and casual home decor. Next, let’s cut into kirigami techniques.
23. Kirigami Cutout Flowers

Kirigami combines cutting and folding to produce intricate, lace-like flower patterns from a single sheet of paper. Fold the paper into quarters or eighths, then cut small notches along the folded edges before unfolding to reveal a symmetrical flower design.
This technique works beautifully for window decorations since light shines through the cutout patterns.
Tip: Use a sharp craft knife rather than scissors for cleaner, more precise cuts on detailed patterns.
Kirigami flowers suit minimalist and Scandinavian-style windows and walls. Now let’s make something functional for everyday use.
24. Paper Flower Magnets and Coasters

Small paper flowers glued onto magnet backings or cork coasters bring color into practical, everyday items. Seal the finished flowers with a clear varnish or resin coating to protect them from moisture and daily wear.
This project makes for an easy handmade gift, especially in sets of four or six matching coasters.
Tip: Use a hole punch and small paper circles for uniform flower sizes that fit coasters neatly.
These functional crafts suit any kitchen or home office. Finally, let’s finish with a showstopper for photos.
25. Giant Paper Flower Backdrop for Photos

A giant paper flower backdrop turns any blank wall into an Instagram-worthy photo spot for parties, weddings, or baby showers. Combine several oversized flowers in a cluster, mounted directly onto a foam board or fabric backdrop for easy transport and reuse.
Choose a color palette that complements the event theme, and vary flower sizes for visual depth.
Tip: Build the backdrop in sections so it’s easier to transport and store between events.
This showstopping project suits any home style when scaled down for a single wall accent.
Paper Flower Craft Difficulty and Time Chart
| Craft Idea | Skill Level | Time Needed | Best Material |
|---|---|---|---|
| Tissue Paper Roses | Beginner | 15 min each | Tissue paper |
| Crepe Paper Peonies | Intermediate | 30-40 min each | Crepe paper |
| Coffee Filter Sunflowers | Beginner | 10 min each | Coffee filters |
| Giant Wall Art Flowers | Intermediate | 45-60 min each | Cardstock/poster board |
| Origami Lilies | Advanced | 20 min each | Square origami paper |
| Kirigami Cutouts | Advanced | 25 min each | Thin cutting paper |
| Cupcake Liner Blossoms | Beginner | 5 min each | Cupcake liners |
Material Cost Comparison Table
| Material | Approx. Cost (per pack) | Flowers Produced | Durability |
|---|---|---|---|
| Tissue Paper | $3-5 | 20-30 flowers | Low-Medium |
| Crepe Paper | $6-10 | 10-15 flowers | Medium-High |
| Cardstock | $8-12 | 15-20 flowers | High |
| Coffee Filters | $2-4 | 25-30 flowers | Low |
| Newspaper | Free | Unlimited | Low-Medium |
Tips for Success
- Always cut a test petal before committing to a full flower shape.
- Work with slightly warm hands or a hairdryer on low heat to shape crepe paper edges naturally.
- Store finished flowers flat in a box to avoid crushing petals during transport.
- Keep a hot glue gun and a bottle of craft glue both on hand—each works better for different paper weights.
- Buy paper in bulk packs to save money on repeat projects.
Common Mistakes and How to Avoid Them
Definition list of frequent slip-ups:
Rushing the glue drying time
: Petals shift or fall off later. Let each layer set for at least 60 seconds before adding the next.
Using paper that’s too thin for large flowers
: Giant blooms need cardstock or poster board, not tissue paper, or they’ll sag.
Ignoring color contrast
: Flowers that match the background too closely disappear visually. Add at least one contrasting shade.
Skipping the wire stem
: Flowers without support flop over in arrangements. Always add floral wire for anything going in a vase.
Similar Variations Worth Trying
- Swap paper types within the same technique (try crepe paper daisies instead of cardstock).
- Add glitter edges or metallic paint for holiday versions of any flower on this list.
- Scale flowers up or down in size to create ombré-style clusters within a single arrangement.
- Combine two techniques, like origami folds with crepe paper petals, for a hybrid design.
Paper flower crafts genuinely offer something for every skill level and every room in the house. I’ve shown you 25 ways to bring color, texture, and a little bit of joy into your space without ever worrying about wilting petals. Grab some paper, pick a project from this list, and start creating—your home (and your wallet) will thank you.