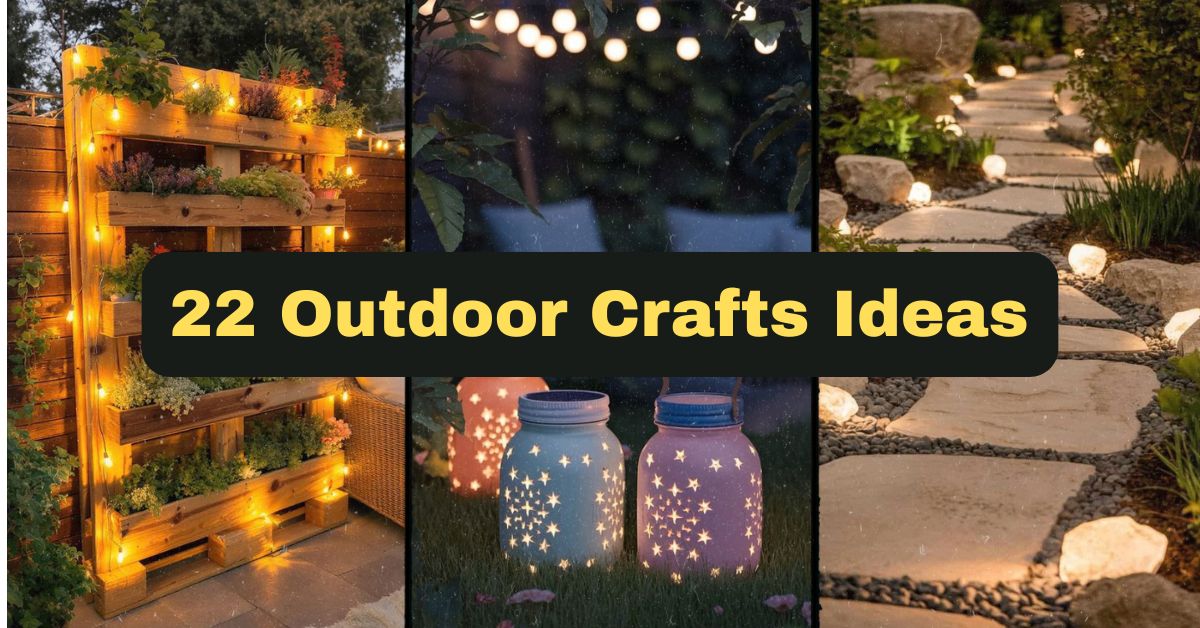
22 Outdoor Crafts Ideas That Turn Your Yard Into a Showpiece
I’ve spent years testing DIY projects, reading through dozens of craft blogs, and honestly getting my hands dirty (literally) with outdoor crafts. That experience means you’re getting tested advice here, not just recycled tips pulled from a Pinterest board. Every idea below has been picked because it actually works in real backyards, not just in perfectly staged photos.
So what are the best outdoor crafts ideas? The top picks include painted rock markers, mason jar solar lanterns, mosaic stepping stones, macrame plant hangers, and DIY birdhouses. These projects use cheap materials, take a weekend or less, and add real charm to any yard, patio, or garden space.
Stick around, because I’m not just listing 22 outdoor crafts ideas — I’m giving you the materials, the step-by-step logic, the common screw-ups, and even smart variations so your project doesn’t end up looking like a Pinterest fail.
What We’re Building and Why It Matters
Before we dive in, let’s talk about why outdoor crafts are worth your weekend. Your yard is basically an extra room of your house — except it doesn’t have walls stopping the sun from making everything fade, or rain from testing your glue. That’s why I picked projects that hold up outside, look good from spring through fall, and don’t cost a fortune. Whether you’ve got a huge backyard or a tiny apartment balcony, there’s something here for you.
1. Painted Rock Garden Markers

Grab some flat river rocks and a few outdoor acrylic paints, and you’ve got yourself the easiest craft on this list. Paint the names of herbs, veggies, or flowers right on the rocks, then seal them with a clear outdoor varnish so rain doesn’t ruin your work. These markers work great in vegetable beds, flower borders, or even as house numbers near your walkway.
Pick bright, contrasting colors so the labels stay readable from a distance. This project suits cottage-style gardens especially well, but honestly, it fits modern minimalist yards too if you stick to a simple color palette like white and sage green. Once you’ve got your markers down, you’ll want lighting to match — which brings us to solar lanterns.
2. Mason Jar Solar Lanterns

Solar lights don’t have to look cheap and plasticky. Take a mason jar, drop in a cheap solar light cap (sold separately at most craft stores), and you’ve got a lantern that glows all night without wiring or batteries to swap. Hang them from tree branches, porch hooks, or fence posts for soft ambient lighting.
For color schemes, frosted glass jars give a dreamy glow, while clear jars show off whatever you tuck inside — fairy lights, sand, or even seashells. A quick tip: spray-paint the metal lid a matte black or bronze for a more polished look. This project fits rustic and farmhouse yards beautifully. Next, let’s make some noise with a wind chime project.
3. Wind Chimes from Repurposed Silverware

Old forks and spoons make surprisingly beautiful wind chimes. Bend the handles slightly with pliers, drill a small hole at the top, and string them from a wooden ring or an old embroidery hoop. The sound is softer than metal tubing chimes, more like a gentle clink than a gong.
Mix silver and copper-toned utensils for visual interest, or spray-paint them all one color for a cleaner look. Hang these near a porch or window where you’ll actually hear the breeze move them. This craft is perfect for eclectic or farmhouse-style homes. Speaking of hanging things, let’s move to vertical planters next.
4. Pallet Wood Vertical Planter

A single wood pallet, sanded down and stood upright, becomes a vertical garden with a little effort. Line the back with landscape fabric, fill the slats with soil, and plant shallow-rooted herbs or succulents. This is a fantastic option if you’re short on ground space but still want greenery.
Stain the wood a warm honey tone for traditional yards, or leave it raw and weathered for an industrial vibe. Attach small hooks along the sides to hang gardening tools too. One tip: water these slowly, since vertical planters drain fast. Now that we’ve built up, let’s get down — literally — with a walkway project.
5. Mosaic Stepping Stones

Broken tiles, old dishware, or colored glass pieces pressed into quick-set concrete create one-of-a-kind stepping stones. Pour the concrete into a round mold, press your mosaic pieces in while it’s still wet, then let it cure for 48 hours before placing it outside.
Choose colors that complement your existing patio or house trim. Blues and whites suit coastal-style yards, while earthy browns and greens fit rustic gardens. A helpful tip: apply a thin layer of grout over the mosaic once it’s set to smooth rough edges and lock pieces in place. Now let’s give the birds something to thank you for.
6. DIY Birdhouse from Scrap Wood

You don’t need fancy carpentry skills for this one. Scrap wood, a saw, some nails, and a small drill bit for the entrance hole are all you need. Keep the design simple — a box with a slanted roof works just fine and actually sheds rain better than flat designs.
Paint it a cheerful color, or leave it natural for a woodland look. Mount it on a pole away from predators, at least five feet off the ground. This craft fits almost any yard style since birdhouses read as classic no matter the paint job. Next, let’s shrink things down with an herb planter idea.
7. Tin Can Herb Garden

Save your soup cans, remove the labels, and give them a coat of chalk paint. Punch drainage holes in the bottom with a hammer and nail, then fill with potting soil and your favorite herbs. Line them up on a windowsill, porch railing, or fence-mounted shelf.
Stick to a two or three-color scheme so the cans look intentional, not random. Cream, sage, and terracotta work well together. A quick tip: wrap the cans in twine for extra texture if painting isn’t your thing. This project is perfect for renters with small balconies. Now, let’s go smaller and more magical.
8. Miniature Fairy Garden

Fairy gardens are basically tiny dollhouse scenes built into a pot or garden corner. Use moss, pebbles, small figurines, and mini furniture pieces to build a scene inside an old wheelbarrow, tree stump, or large planter. Kids love helping with this one, and it’s genuinely relaxing to build.
Keep your color palette natural — greens, browns, and soft pastels — so it blends with real plants around it. A helpful tip: use succulents instead of regular plants since they grow slowly and won’t overwhelm your tiny scene. This craft suits whimsical, cottage-core yards perfectly. Let’s move from tiny scenes to functional hangers.
9. Macrame Plant Hangers

Macrame plant hangers bring texture and a boho touch to any porch or patio. All you need is cotton cord, a wooden ring, and some basic knot-tying (square knots and half-hitches do most of the work). YouTube tutorials make this way easier than it sounds.
Natural cream-colored cord fits most styles, but dyed cord in rust or navy works for bolder statements. Hang these at varying heights for visual interest instead of one straight row. This project fits bohemian and mid-century modern yards especially well. Now let’s cast something a little more permanent.
10. Concrete Leaf Castings

Big leaves from hostas or rhubarb make excellent molds for concrete castings. Coat the underside of the leaf with cooking spray, spread a thick layer of concrete mix over it, let it cure, then peel the leaf away to reveal a detailed vein pattern in the concrete.
These make great garden path accents or bird feeder platforms. Tint the concrete gray, terracotta, or mossy green using concrete dye. A useful tip: cure these on a slight curve (like over a mound of sand) so rainwater rolls off naturally. This craft fits naturalistic, woodland-style gardens best. Let’s head to the water’s edge next.
11. Driftwood Wall Art

If you live near a beach or lake, driftwood is basically free art supply. Arrange pieces on a wood backing board, gluing and screwing them in place to form an abstract design or even a simple shape like a wave or a heart.
Leave the wood natural for coastal styles, or add a light whitewash for a beachy farmhouse feel. Hang it on a fence or exterior wall where it gets partial shade so the wood doesn’t crack. This project is a great weekend activity if you’re already near the shore. Now, let’s repurpose something a little more industrial.
12. Repurposed Tire Swing Planter

Old tires make surprisingly sturdy planters when hung from a tree branch with rope. Cut the tire in half, flip the halves to form a bowl shape, add drainage holes, and fill with soil and trailing plants like petunias or ivy.
Paint the rubber a bright color for a playful backyard look, or leave it black for a more understated industrial vibe. A helpful tip: use a swivel hook at the top so the planter doesn’t tangle as it spins in the wind. This fits casual, family-friendly backyards perfectly. Let’s move to something shinier next.
13. Bottle Cap Mosaic Art

Save bottle caps for a few months and you’ll have enough for a colorful mosaic piece. Arrange them on a wood board in a pattern or picture, then glue them down and seal with clear outdoor varnish to prevent rust.
This craft naturally has a fun, eclectic color scheme since caps come in every color imaginable. It works great as a fence decoration or garden sign background. A quick tip: sort caps by color first so your design comes together faster. This suits quirky, casual outdoor spaces. Now let’s frame some nature.
14. Twig Picture Frames

Collect straight twigs of similar thickness, then glue them around the edge of an old picture frame for an instant natural upgrade. This works with frames you already have or thrifted ones that need a refresh.
Leave the twigs raw for a woodland look, or spray-paint them white for a coastal cottage feel. Fill the frame with a nature photo, a pressed flower, or even a small mirror. A tip: seal the twigs with matte varnish so they hold up to weather changes. This fits rustic and farmhouse porches nicely. Next, seashells take center stage.
15. Seashell Wind Chimes

Similar to the silverware chimes, but with a coastal twist. Drill small holes in seashells, then string them from driftwood or a metal hoop using fishing line or twine. The sound is softer and more delicate than metal chimes.
Mix shell sizes for visual balance, and keep the color palette natural — whites, tans, and soft pinks. Hang these near a porch entrance for a welcoming beachy touch. A helpful tip: use a waterproof glue at the drill points so shells don’t crack over time. This fits coastal and Mediterranean-style yards beautifully. Let’s give the birds a bath next.
16. DIY Birdbath from Thrifted Bowls

An old ceramic bowl glued atop a sturdy pedestal (a thrifted lamp base works great) makes an instant birdbath. Seal any seams with waterproof epoxy so it holds water without leaking.
Choose a bowl with a color that pops against your greenery — cobalt blue or bright yellow both work well. A quick tip: add a few flat stones inside so birds have something to perch on while drinking. This craft fits cottage and traditional gardens equally well. Now let’s paint some pots.
17. Painted Terracotta Pot Family

Buy a set of terracotta pots in graduating sizes, then paint them in a coordinated color scheme — think ombre shades of blue or a mix of complementary pastels. Group them together on a porch step or garden ledge for a charming display.
Seal with an outdoor sealant so the paint doesn’t chip from watering. A tip: paint the rims a contrasting color for a polished, finished look. This project suits nearly every home style since terracotta itself is a classic, adaptable material. Let’s build something a little taller next.
18. Ladder Plant Stand

An old wooden ladder, laid flat or leaned against a wall, becomes an instant multi-tiered plant stand. Sand down rough edges and add a coat of weatherproof stain or paint.
Distressed white fits farmhouse yards, while a natural wood stain suits traditional or rustic spaces. Arrange pots of varying heights along each rung for a layered garden display. A helpful tip: secure the ladder to the wall with a strap if it’s leaning, so wind doesn’t knock it over. Now let’s number your path.
19. Garden Stone Pathway Numbers

Similar to the mosaic stepping stones, but this time you’re pouring numbered or lettered stones to mark house numbers, garden zones, or a fun quote along a walkway. Use rubber number molds pressed into wet concrete for crisp edges.
Stick to one font style throughout for a cohesive look. A quick tip: seal the finished stones to prevent cracking from freeze-thaw cycles if you live somewhere cold. This suits modern and traditional homes alike since house numbers are universally useful. Let’s light things up again.
20. Wine Bottle Tiki Torches

Empty wine bottles make elegant tiki torch bases. Fill with citronella oil, add a wick kit (sold at most craft stores), and you’ve got a bug-repelling light source for patio nights.
Group bottles of different colors — green, amber, clear — for a collected, curated look. A helpful tip: place these on a stable surface since glass bottles tip easily in wind. This project fits casual backyard gatherings and modern patios equally well. Let’s spin things up next.
21. Pinwheel Garden Spinners

Cut sturdy scrapbook paper or thin metal into pinwheel shapes, attach to a dowel with a small pin, and stick them into garden beds for playful movement and color. Kids especially love helping make these.
Bright primary colors suit playful, family-friendly yards, while metallic tones fit more modern spaces. A tip: laminate paper pinwheels so they survive rain better. This craft brings movement and whimsy to any flower bed. Let’s finish with something cozy.
22. Rustic Log Candle Holders

Cut small sections of a fallen log, drill holes sized to fit tea light candles, and you’ve got instant rustic candle holders for patio tables or garden pathways. Sand the tops smooth so candles sit flat and steady.
Leave the bark on for a woodland feel, or peel it off for a cleaner, modern look. A helpful tip: use flameless LED tea lights if you’re placing these near dry grass or wood decking. This project fits rustic, farmhouse, and cabin-style outdoor spaces perfectly.
Materials and Difficulty Overview
| Craft Idea | Skill Level | Estimated Cost | Time Needed |
|---|---|---|---|
| Painted Rock Markers | Beginner | Under $10 | 1 hour |
| Mason Jar Solar Lanterns | Beginner | $15-25 | 30 minutes |
| Silverware Wind Chimes | Intermediate | $10-15 | 1-2 hours |
| Pallet Vertical Planter | Intermediate | $20-40 | Half day |
| Mosaic Stepping Stones | Intermediate | $20-30 | 2 days (with curing) |
| DIY Birdhouse | Intermediate | $15-25 | 2-3 hours |
| Tin Can Herb Garden | Beginner | Under $15 | 1 hour |
| Fairy Garden | Beginner | $20-35 | 2 hours |
| Macrame Plant Hangers | Intermediate | $10-20 | 1-2 hours |
| Concrete Leaf Castings | Intermediate | $15-25 | 2 days (with curing) |
| Driftwood Wall Art | Beginner | Free-$15 | 2-3 hours |
| Tire Swing Planter | Advanced | $10-20 | Half day |
| Bottle Cap Mosaic | Intermediate | Free-$10 | 3-4 hours |
| Twig Picture Frames | Beginner | Free-$10 | 1 hour |
| Seashell Wind Chimes | Beginner | Free-$15 | 1-2 hours |
| Thrifted Bowl Birdbath | Intermediate | $15-30 | 1 hour + drying |
| Terracotta Pot Family | Beginner | $20-40 | 2 hours |
| Ladder Plant Stand | Intermediate | $15-40 | Half day |
| Pathway Number Stones | Intermediate | $20-30 | 2 days (with curing) |
| Wine Bottle Tiki Torches | Beginner | $15-25 | 1 hour |
| Pinwheel Spinners | Beginner | Under $10 | 1 hour |
| Log Candle Holders | Intermediate | $10-20 | 2 hours |
Tips for Success
Getting a great result comes down to a few habits I’ve picked up over the years:
- Always use outdoor-rated sealants and paints, since indoor products fade or peel fast outside.
- Work on projects during dry weather so paint and glue cure properly.
- Test small batches of concrete or dye mixtures before committing to a big project.
- Let projects fully cure or dry before placing them in direct sun or rain.
- Keep a small toolkit (drill, sandpaper, waterproof glue) handy since most of these crafts share the same basic tools.
Common Mistakes and How to Avoid Them
Definition List: Common Craft Mistakes
Skipping the sealant
Skipping a weatherproof sealant means your paint job or wood project won’t survive more than one season outside. Always seal.
Using indoor glue
Regular craft glue breaks down with moisture. Stick to outdoor or waterproof epoxy for anything exposed to rain.
Rushing the curing time
Concrete projects especially need full curing time — usually 48 hours — before you move or use them.
Ignoring drainage
Any planter project needs proper drainage holes, or roots will rot within weeks.
Overcomplicating the first project
Starting with an advanced project like the tire planter before trying something simple can lead to frustration. Build skills gradually.
Similar Variations You Can Try
If you enjoyed these ideas, here are a few easy twists to keep the creativity going:
- Swap paint colors seasonally on terracotta pots or wooden signs to match holidays.
- Use LED string lights instead of candles in log holders for a safer, longer-lasting glow.
- Trade mosaic tile for sea glass on stepping stones for a beachier finish.
- Turn birdhouses into bee hotels by adjusting hole sizes for a pollinator-friendly yard.
- Build a mini version of the ladder plant stand using a step stool for smaller spaces.
Wrapping It Up
There you have it — 22 outdoor crafts ideas that actually hold up outside and look good doing it. I’ve tried to give you real numbers, real timeframes, and real mistakes to dodge, so you’re not just guessing your way through a Saturday project. Pick one that fits your skill level, grab your tools, and get started this weekend.
Whichever project you choose, remember that outdoor crafts don’t need to be perfect to be beautiful — a little weathering and imperfection is part of their charm.